What is a webhook and how to create one?
Webhooks are key to building reliable and responsive systems. However, you must know how to use them properly. Let's explore what is a webhook and how to support webhooks in your application
As most of what we do on the web can be described by events, webhooks have become a de facto way of connecting systems, whether it's a new user account creation, successful payment, DockerHub image push event or a new pull request in your Git repository. They are incredibly useful and lightweight way of sharing information. Let's explore the meaning of webhooks and how they can help you.
So, what exactly is a webhook? A webhook is a way for an app to provide other applications with real-time information. A webhook delivers data to other applications as it happens, meaning you get data immediately. Unlike typical APIs where you would need to poll for data very frequently in order to get it real-time. This makes webhooks much more efficient for both provider and consumer. And as most of the providers have strict API rate limits, you will either have to adopt webhooks or accept that your system will always be slightly (or more) out-of-date. The example above shows a typical flow for requesting payments from the users.
Webhooks are sometimes referred to as “Reverse APIs,” as they give you what amounts to an API spec, and you must design an API for the webhook to use. The webhook will make an HTTP request to your app (typically a POST), and you will then be charged with interpreting it. You can think of it as a regular API route that your CLI/UI uses but in this case the user will be 3rd party service that you rely on.
While most developers are consuming webhooks that are produced by popular services such as Stripe or GitHub, sometimes you also want to let users receive webhooks from your application. In this blog post, we will build a simple application where users can register their endpoints and receive events.
If you would like to see learn how to handle incoming webhook in your application, check our tutorial instead.
Creating a webhook dispatching application
Our application will be written in Go (installation instruction can be found in the golang.org install page) but you can choose any language you want and this is just a simple example that demonstrates the outgoing webhook behavior. The code is simple and even non-Go developers should find it readable:
package main

import (
    "bytes"
    "encoding/json"
    "fmt"
    "log"
    "net/http"
    "sync"
    "time"
)

// port - default port to start application on
const port = ":8090"

type WebhookRequest struct {
    Name        string
    Destination string
}

func main() {

    dispatcher := &Dispatcher{
        client:       &http.Client{},
        destinations: make(map[string]string),
        mu:           &sync.Mutex{},
    }

    // preparing HTTP server
    srv := &http.Server{Addr: port, Handler: http.DefaultServeMux}

    // webhook registration handler
    http.HandleFunc("/webhooks", func(resp http.ResponseWriter, req *http.Request) {
        dec := json.NewDecoder(req.Body)
        var wr WebhookRequest
        err := dec.Decode(&wr)
        if err != nil {
            resp.WriteHeader(http.StatusBadRequest)
            return
        }

        dispatcher.add(wr.Name, wr.Destination)
    })

    // start dispatching webhooks
    go dispatcher.Start()

    fmt.Printf("Create webhooks on http://localhost%s/webhooks \n", port)
    // starting server
    err := srv.ListenAndServe()

    if err != http.ErrServerClosed {
        log.Fatalf("listen: %s\n", err)
    }
}

type Dispatcher struct {
    client       *http.Client
    destinations map[string]string
    mu           *sync.Mutex
}

func (d *Dispatcher) Start() {
    ticker := time.NewTicker(5 * time.Second)
    defer ticker.Stop()
    for {
        select {
        case <-ticker.C:
            d.dispatch()
        }
    }
}

func (d *Dispatcher) add(name, destination string) {
    d.mu.Lock()
    d.destinations[name] = destination
    d.mu.Unlock()
}

func (d *Dispatcher) dispatch() {
    d.mu.Lock()
    defer d.mu.Unlock()
    for user, destination := range d.destinations {
        go func(user, destination string) {
            req, err := http.NewRequest("POST", destination, bytes.NewBufferString(fmt.Sprintf("Hello %s, current time is %s", user, time.Now().String())))
            if err != nil {
                // probably don't allow creating invalid destinations
                return
            }

            resp, err := d.client.Do(req)
            if err != nil {
                // should probably check response status code and retry if it's timeout or 500
                return
            }

            fmt.Printf("Webhook to '%s' dispatched, response code: %d \n", destination, resp.StatusCode)

        }(user, destination)
    }
}
Running your webhook producer
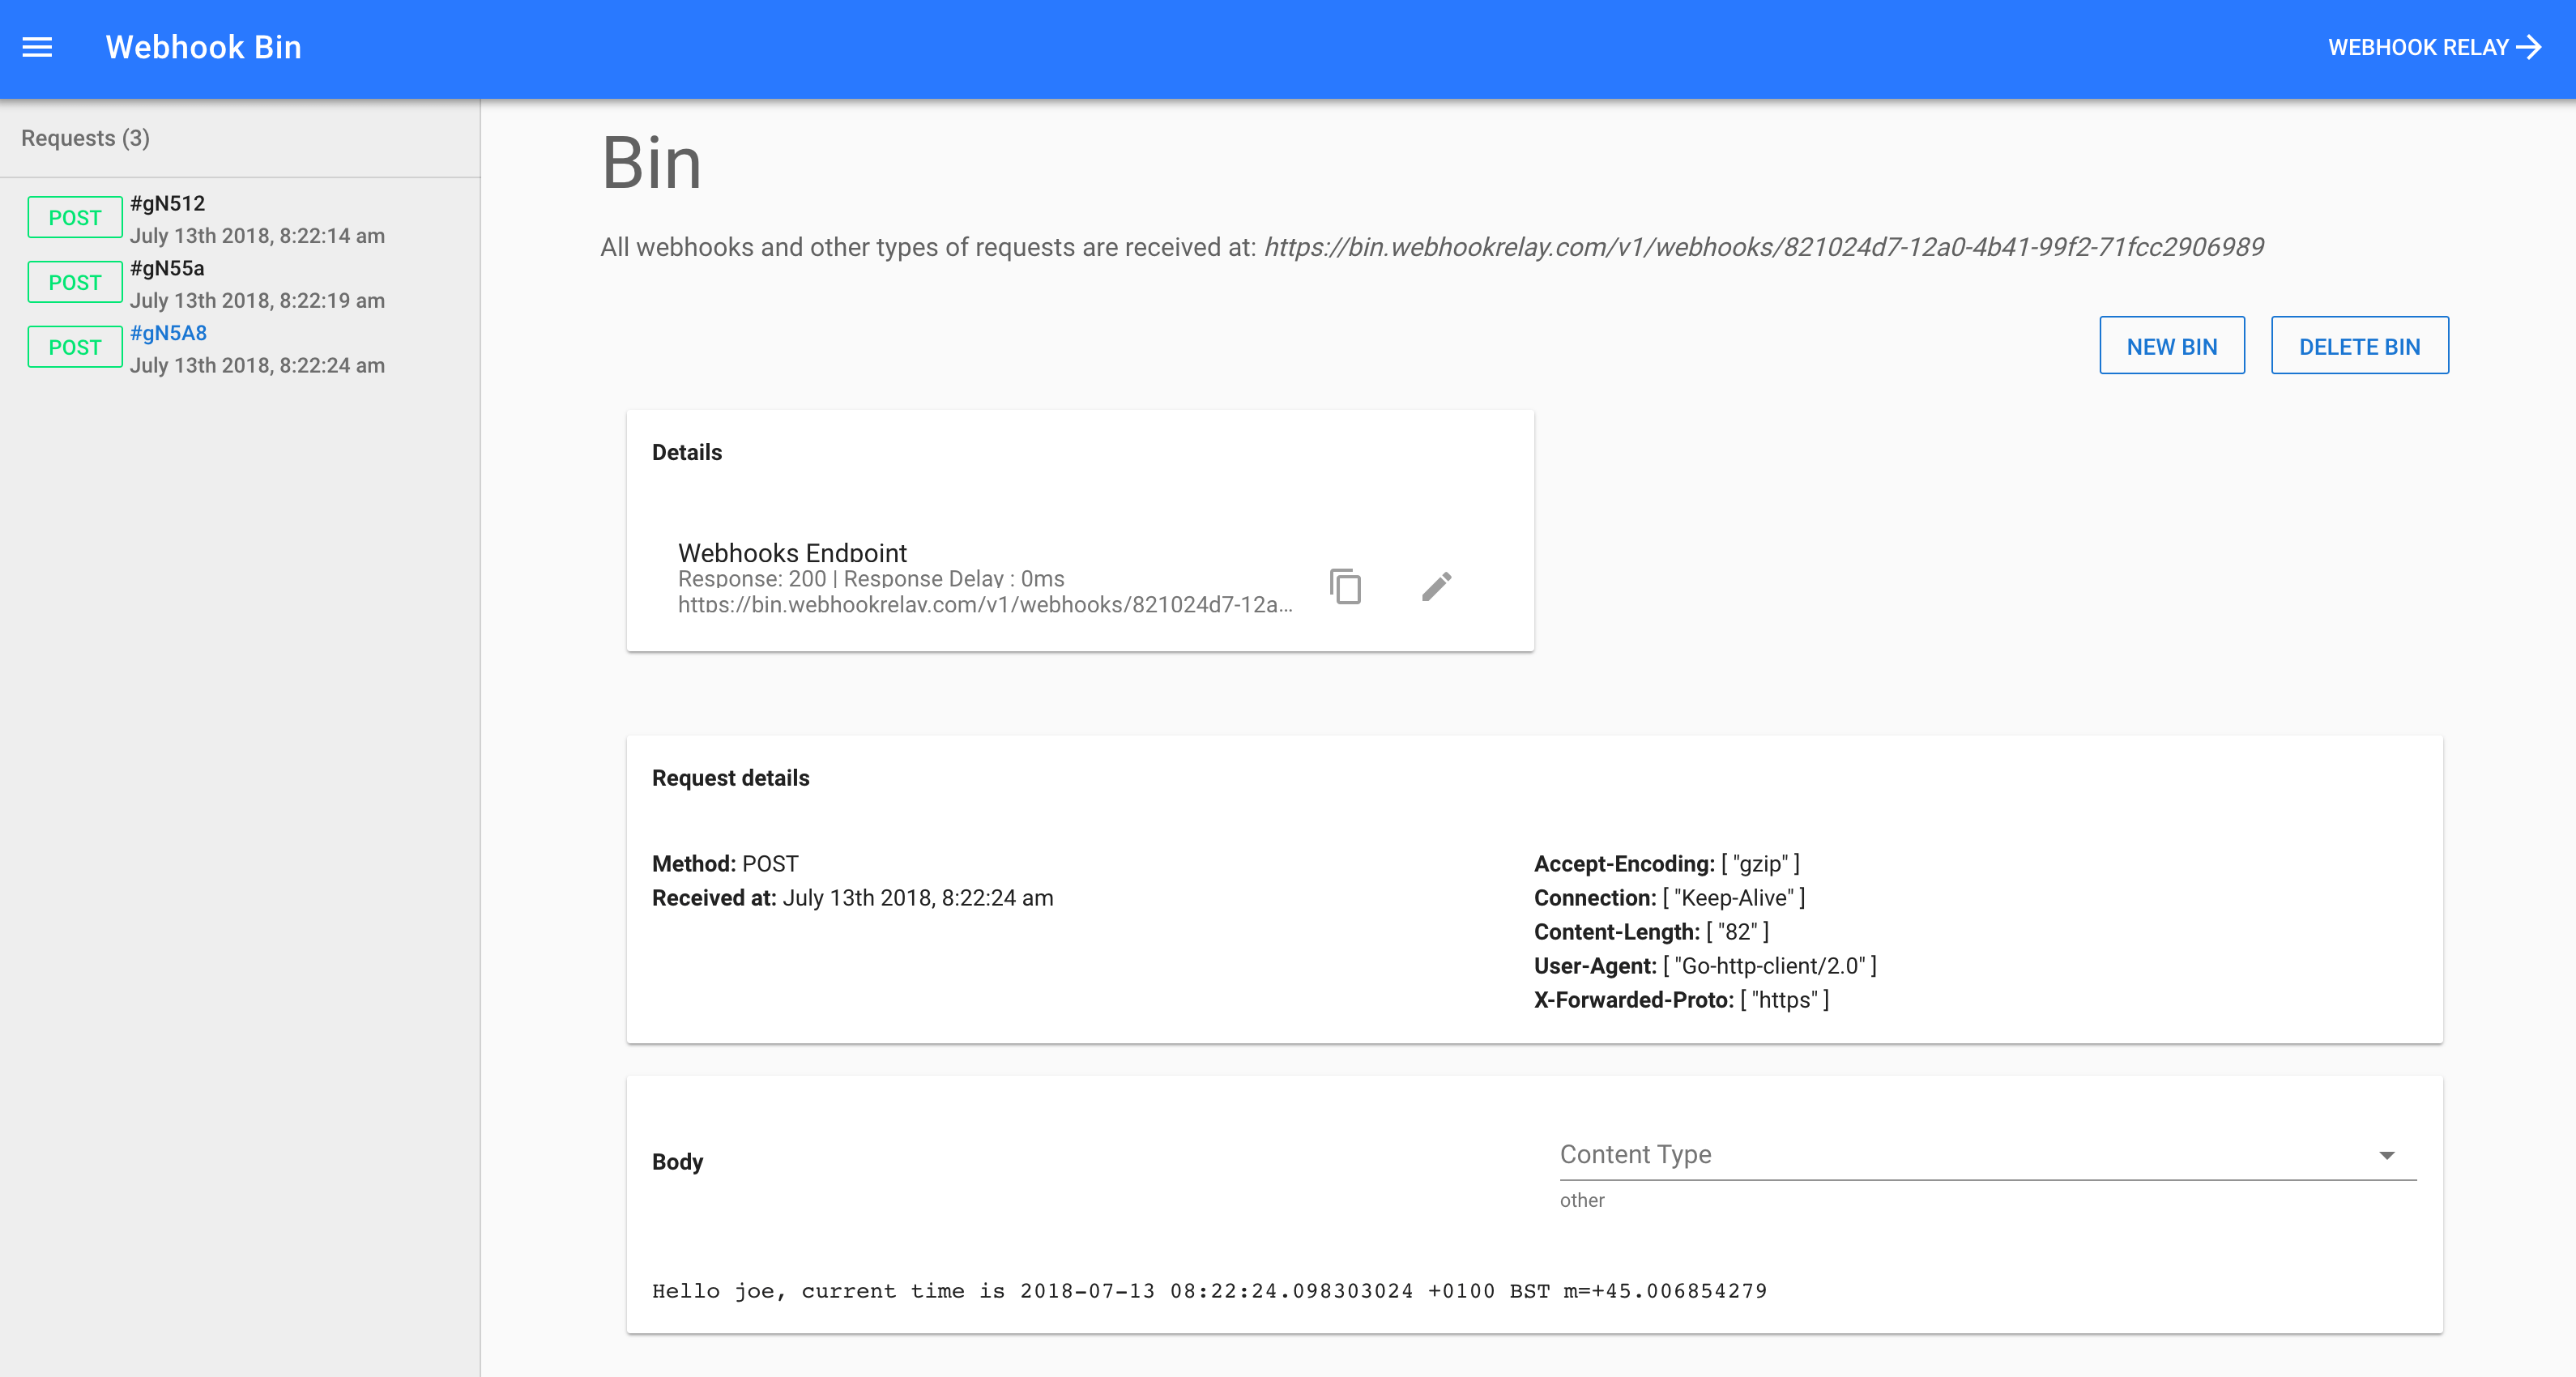
To use our webhook producer we need an endpoint that can receive and help us debug it. For this task, we will be using this free service: https://bin.webhookrelay.com/. Upon opening the link you should be redirected to a unique URL that is your bin. Get the bin address, you will need it in a minute.
Let's start our application:
$ go run main.go
Create webhooks on http://localhost:8090/webhooks
Now, add our bin:
curl --request POST \
  --url http://localhost:8090/webhooks \
  --header 'content-type: application/json' \
  --data '{
    "name": "joe",
    "destination": "https://bin.webhookrelay.com/v1/webhooks/821024d7-12a0-4b41-99f2-71fcc2906989"
}'
After adding it, in a few seconds you should start seeing logs:

And in our webhooks bin we should see incoming requests:

Conclusion
To wrap up - webhooks and API requests are similar, both are events and the intent is to share information between systems. While API polling might look like a nice solution early on, having too many users relying on it could bring your backend down or considerably affect performance.
To successfully implement webhooks in your system, consider:
- User should be able to specify a destination of the webhook
- While most systems only allow a single destination to be added for webhooks, you might want to allow more.
- Retry webhooks if the status code is >=500. While some might argue that we should retry with 4XX status codes, they usually mean that it's a bad request and we shouldn't retry the same request.
Interested or working with webhooks? Check out how you can receive webhook on localhost or private networks in our tutorials section. Webhook Relay has a free tier for developers!


