
Home Assistant remote access add-on
Reverse tunnels for testing and development environments
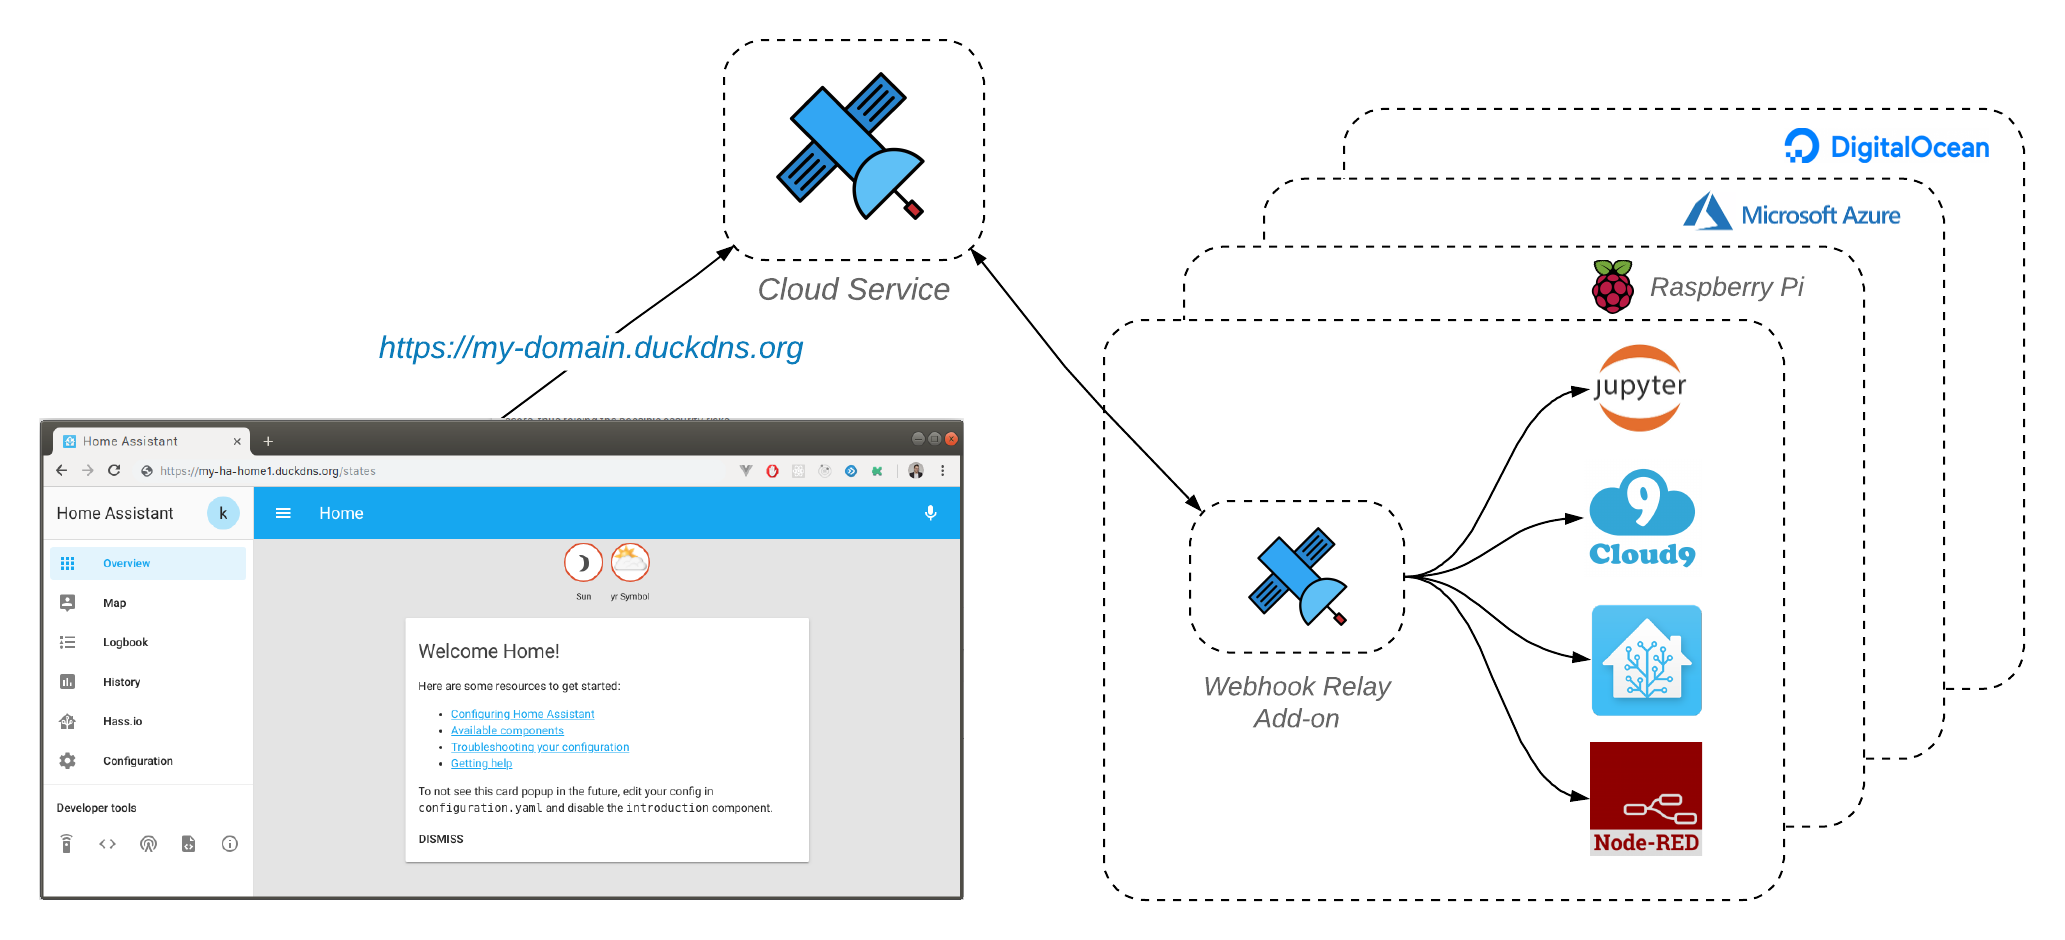
Webhook Relay add-on allows remote access to Home Assistant without configuring your router, firewall or having a static public IP. It works by creating secure reverse tunnels back to the cloud service.
Goal of this tutorial
Secure, end-to-end TLS encrypted access to your Home Assistant without configuring your router or having a static IP. Instead of HTTPS tunnels that are being terminated on Webhook Relay servers, we will be using TLS tunnels that are only being terminated at your end so even if we are forced to, we couldn't intercept traffic without your browser notifying you.
Before we begin
This tutorial will expect you to have:
- Basic plan subscription ($9.99/m) which enables whitelisted domains and TLS pass-through tunnels. Check plans and pricing here. We do offer a 7-day money back guarantee. Subscribe to it on your accounts page. If you don't want to commit, drop us an email at [email protected] and we will set up a trial for you.
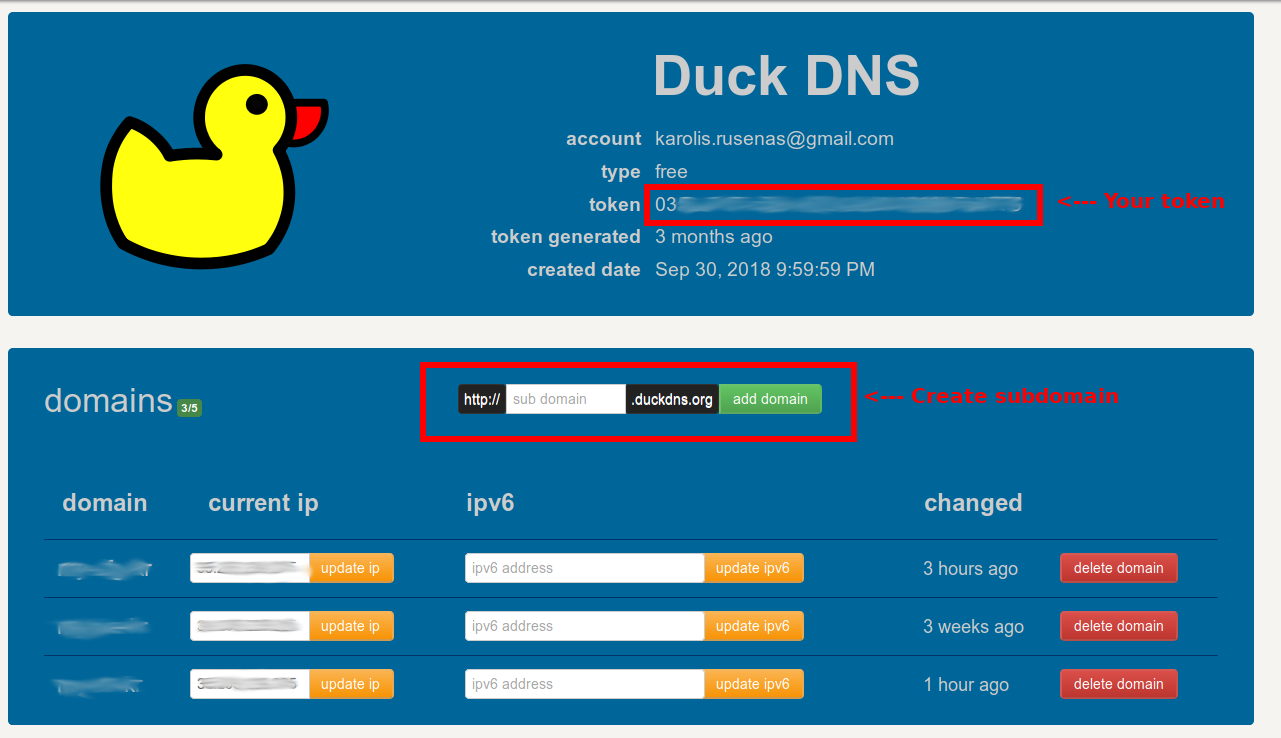
- DuckDNS account to get your own free domain and retrieve TLS certificate through Let's Encrypt.
Quick Start
Installation of this add-on is pretty straightforward and not different in comparison to installing any other Hass.io add-on:
- Add our Hass.io add-ons repository URL to your Hass.io instance: https://github.com/webhookrelay/home-assistant.
- Install the “Webhook Relay” add-on.
- Generate token key & secret pair and add it to the add-on configuration.
- Get DuckDNS token and create your domain. Add those details to the "tunnels" config section and "duck_dns" section. Set "accept_terms" to true if you accept Let's Encrypt ToS.
- Start the “Webhook Relay” add-on.
- Check the logs of the “Webhook Relay” add-on to see if everything went well. It should print out your public URL.
TLS pass-through add-on configuration
Once you have:
- Webhook Relay key & secret
- DuckDNS domain
- DuckDNS token
Use those details to populate add-on configuration:
{
    "key": "your-webhookrelay-key",
    "secret": "your-webhookrelay-secret",
    "forwarding": [
      {
          "bucket": "ha",
          "destination": "http://127.0.0.1:8123"
      }
    ],
    "tunnels": [
        {
            "name": "ha",
            "destination": "http://127.0.0.1:8123",
            "protocol": "tls",
            "domain": "your-domain.duckdns.org"
        }
    ],
    "duck_dns": {
        "token": "your-duckdns-token",
        "accept_terms": true
    },
    "tunnels_enabled": true,
    "forwarding_enabled": false
}
Make sure that the "protocol" is set to tls, tunnels_enabled is set to true.
Add-on will automatically:
- Configure DuckDNS to point to a correct address (public tunnel endpoint IP)
- Configure and retrieve certificate and private key from Let's Encrypt
- Store certificate & key in
/data/directory - Configure Webhook Relay tunnel
- Starts serving traffic
Wrapping up
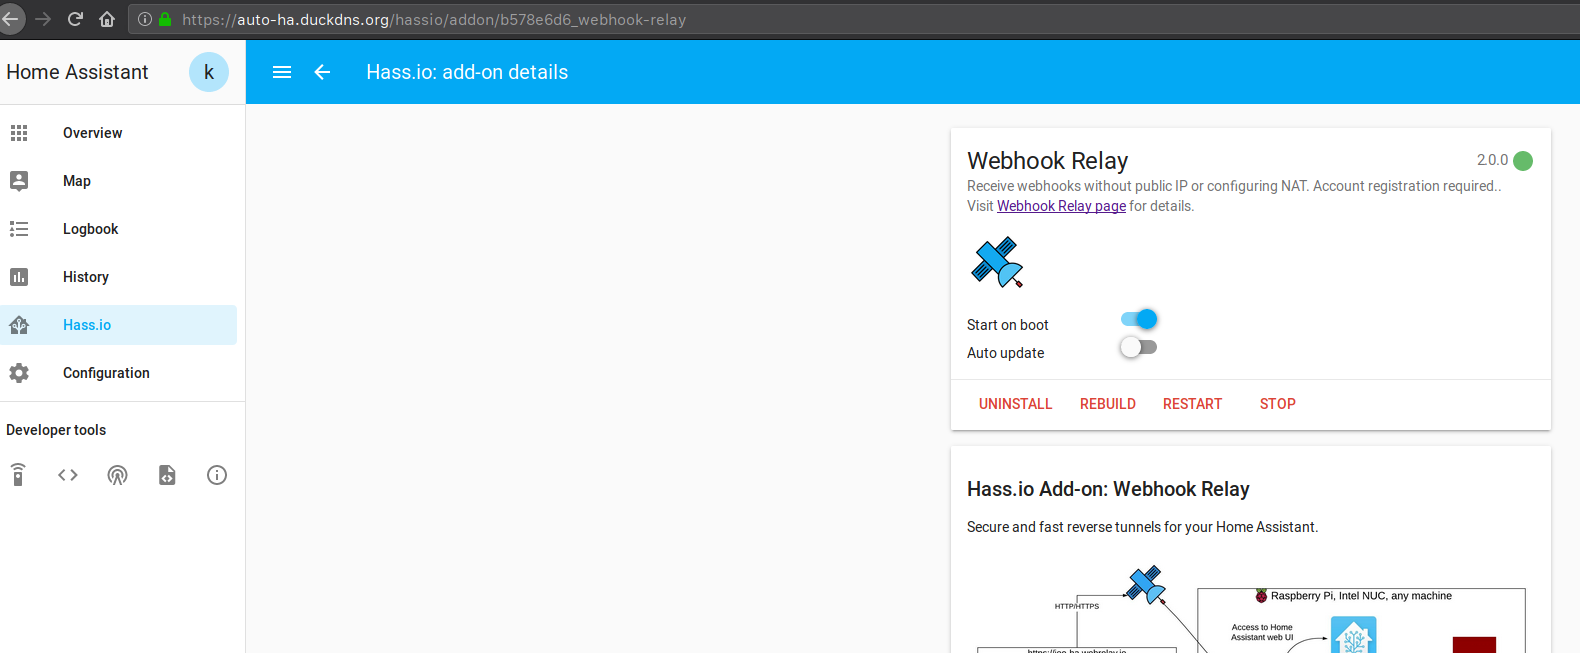
That's it, you should be able to access your Home Assistant through your domain that you have configured, in my case it's https://auto-ha.duckdns.org. We have got full, end-to-end encryption without configuring your router or getting a static IP:
Also, instead of using DuckDNS & Let's Encrypt, you can use any certificate you want or just don't supply any certs to the add-on and terminate TLS on Home Assistant server. For that you will just have to specify HTTPS in the destination: "destination": "https://127.0.0.1:8123"
P.S.
If you just want to receive webhooks, feel free to use our free tier! Or if you don't want to commit but would really like to try it, email us at [email protected] and we might think of something :)
Not using Hass.io? Check out my previous blog post that details a simple setup with Docker here.