Rancher - push to deploy workflow with Keel
Configuring push to deploy workflow with Rancher and Keel
In this article, we will show how easy it is to configure "push to deploy" workflows with Rancher and Keel. If you are not familiar with Rancher, please visit their excellent website. This article might look lengthy but it's only because there are a lot of screenshots to help you guide through Rancher's UI. Also, once the initial setup of DockerHub, Webhook Relay and Keel is done, all the cluster workloads will get a self-service style automated updates.
Short intro to Rancher
It's a fantastic tool that lets you provision and manage Kubernetes clusters. To see how it is different from other tools, check out this page. It's similar to OpenShift but seems a lot more lightweight. Unlike Rancher, OpenShift only supports a single Kubernetes cluster per OpenShift deployment and does not support running on cloud-hosted Kubernetes services such as GKE, EKS and AKS.
Short intro to Keel
Keel is a continuous delivery tool aimed at Kubernetes that features:
- No CLI/API
- Self-service functionality (you just add labels or annotations to your deployments and that's it, no need to configure Keel directly)
- Stateless - no database/cache
- Policy driven updates (SemVer, regexp, etc.) - each deployment can have different update policies
- Integrates with major Docker registries through webhooks and polling, configures subscriptions to Google Cloud GCR
Keel is used by hundreds of companies in production every day and saved countless hours for me!
Prerequisites
- Kubernetes cluster (in my case I am using Minikube)
- Webhook Relay account and relay CLI
- Rancher (here's an article on how to set it up with Minikube or Docker for Mac)
Good thing about this setup when pairing Keel with Webhook Relay is that it will work anywhere as long as there's an internet connectivity. Webhooks will be delivered to private networks as well.
Configuring Keel
Create a new namespace 'keel'
Go to your current project or create a new project and create a new namespace called keel.
Add your key & secret to the cluster
Since we are going to use Webhook Relay sidecar to receive webhooks inside your cluster, it will need authentication details. Go to https://my.webhookrelay.com/tokens and click CREATE TOKEN. Grab your key and secret.
Now, go to your project > resources > secrets:
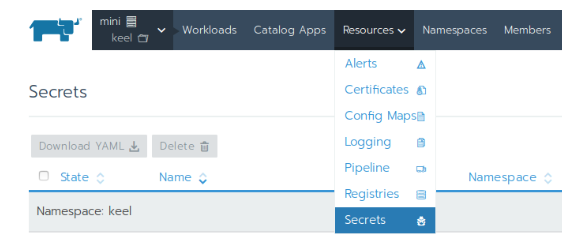
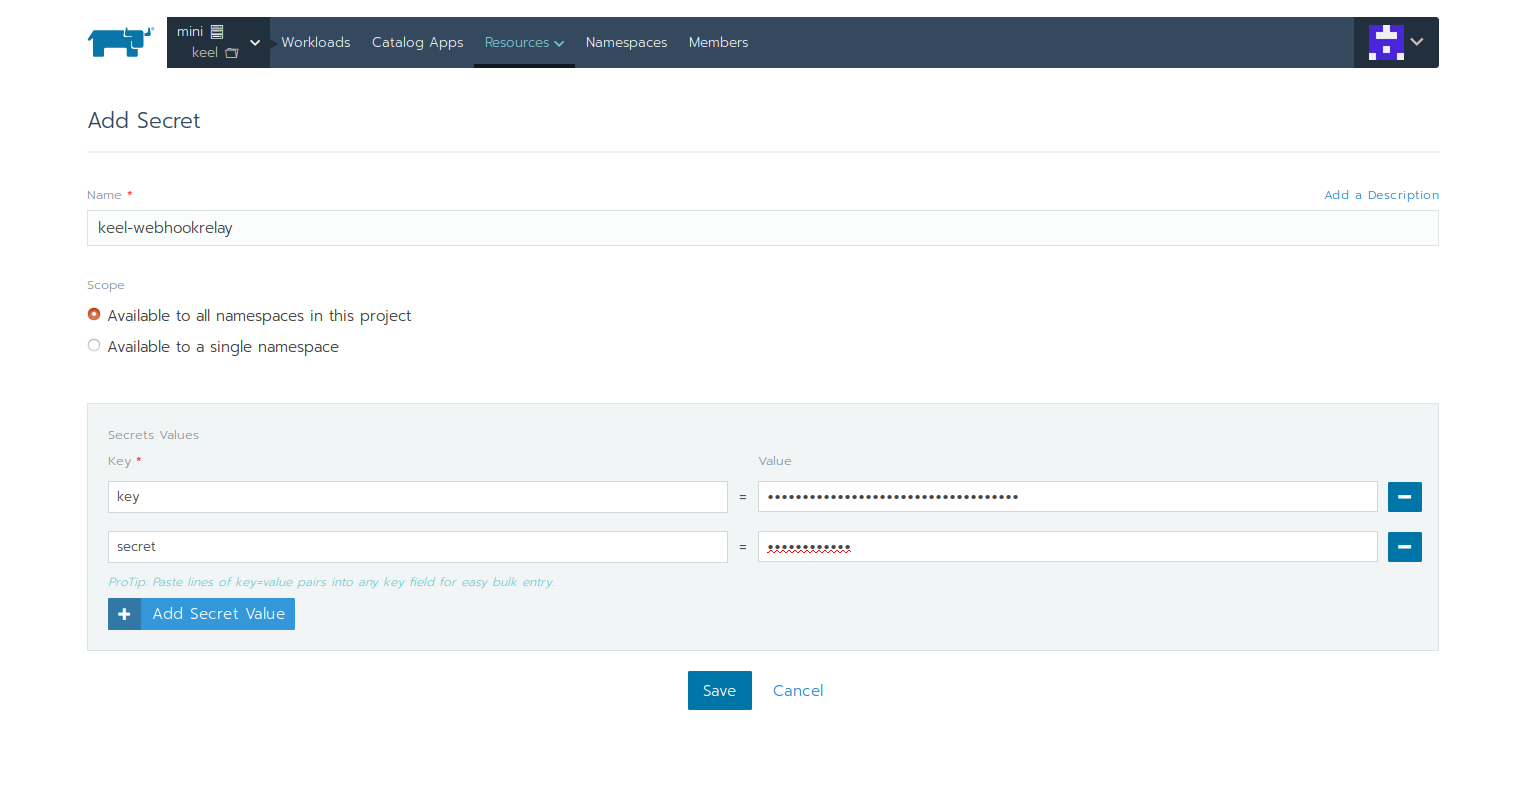
And create a new secret with key/value pairs:
- key = your token key
- secret = your token secret
It should look like:
Configure Webhook Relay bucket
Buckets provide a grouping of your public endpoints and destinations, where to forward webhooks.
Open https://my.webhookrelay.com/buckets and create a new bucket named 'keel'. Once you have it, you will need to create a new output that will point to our Keel. Since Webhook Relay is a sidecar, we will reach it by localhost, so the destination is http://localhost:9300/v1/webhooks/dockerhub. Keel supports a number of registries, you can view their endpoints in the official Keel documentation.
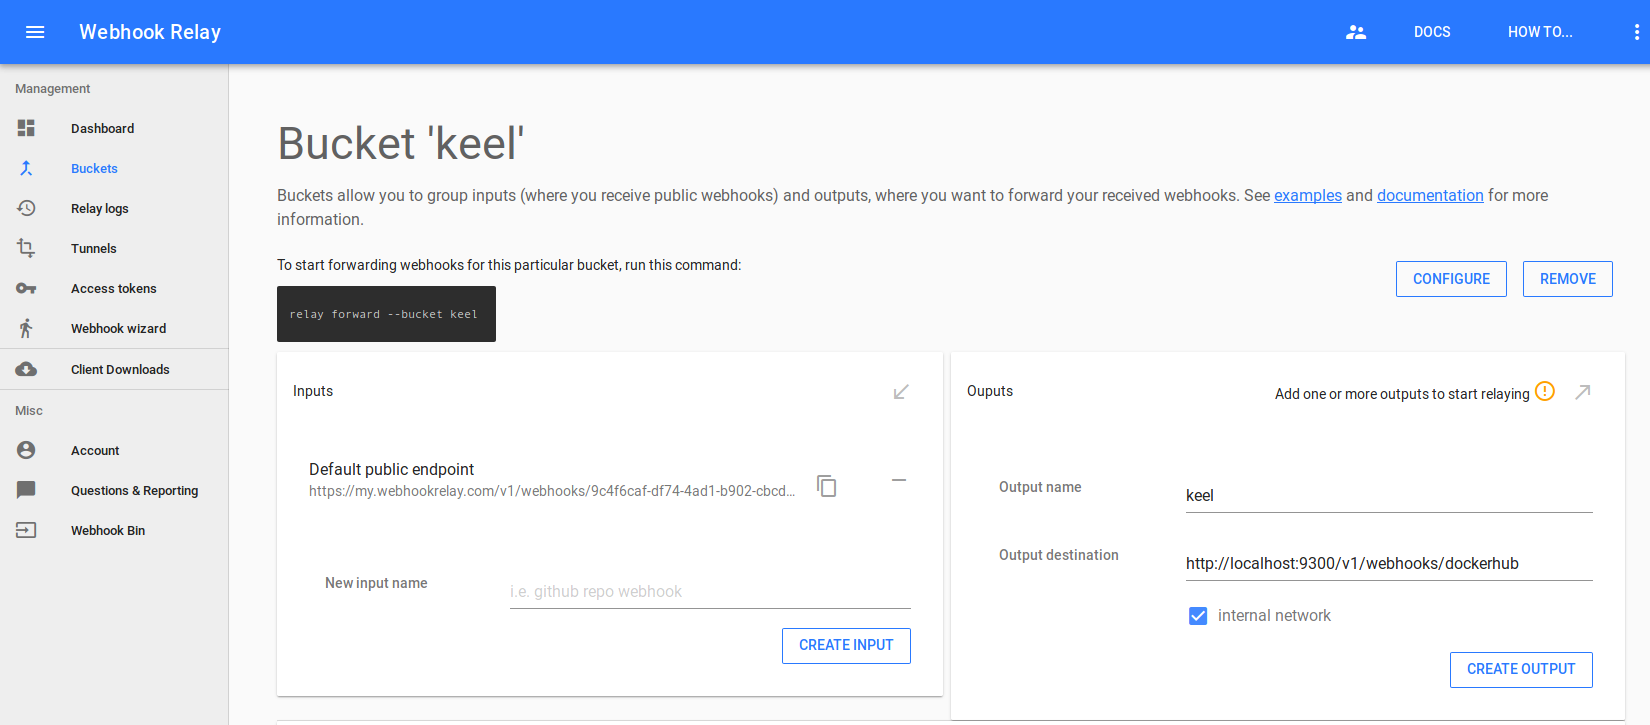
Deploying Keel with Webhook Relay sidecar
Now, when in Keel project go to Workloads and click "import yaml". Take example configuration from https://raw.githubusercontent.com/keel-hq/keel/master/deployment/deployment-rbac-whr-sidecar.yaml. In this example we will just update:
- Image tag to the current latest
0.13.0-rc1. - In the Webhook Relay sidecar configuration set bucket to 'keel':
            - name: BUCKET
              value: "keel"
At this point you can configure more things in Keel such as Slack notifications, AWS ECR registry authentication or anything else that you think is useful.
You should see Keel being created and happy:

Configure DockerHub webhooks
Head to your DockerHub repository https://hub.docker.com/r/karolisr/webhook-demo/~/settings/webhooks/ (replace with your username and repository) and add your public webhooks endpoint from https://my.webhookrelay.com/buckets:
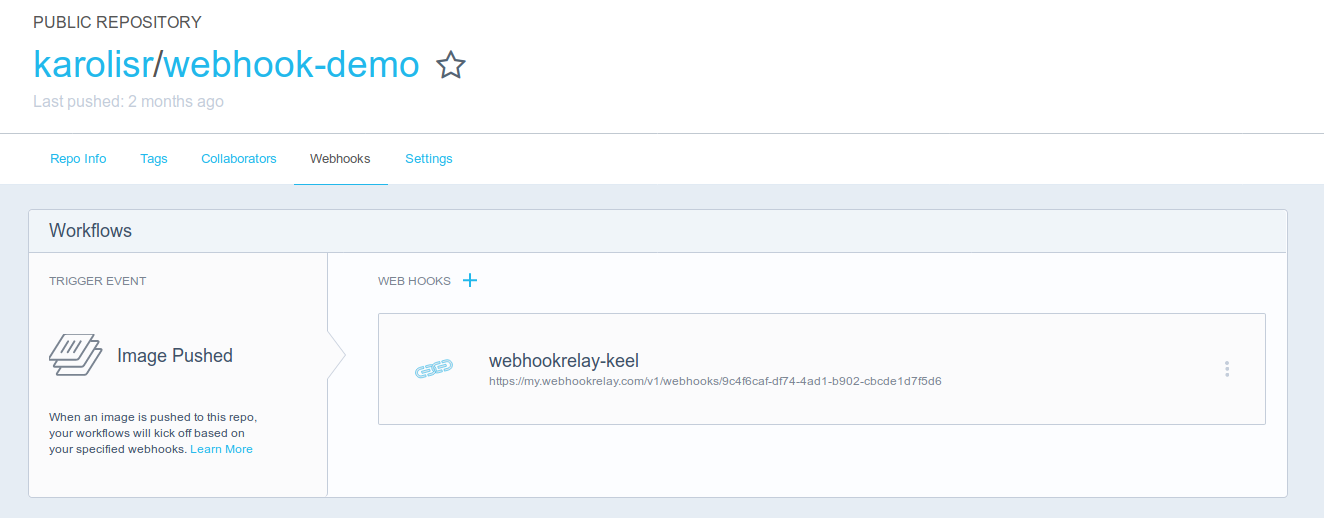
In this step, we configure DockerHub to send notifications to Webhook Relay about push events to the Docker registry.
Deploying example application
First, we will deploy our example app, image: karolisr/webhook-demo:0.0.15:
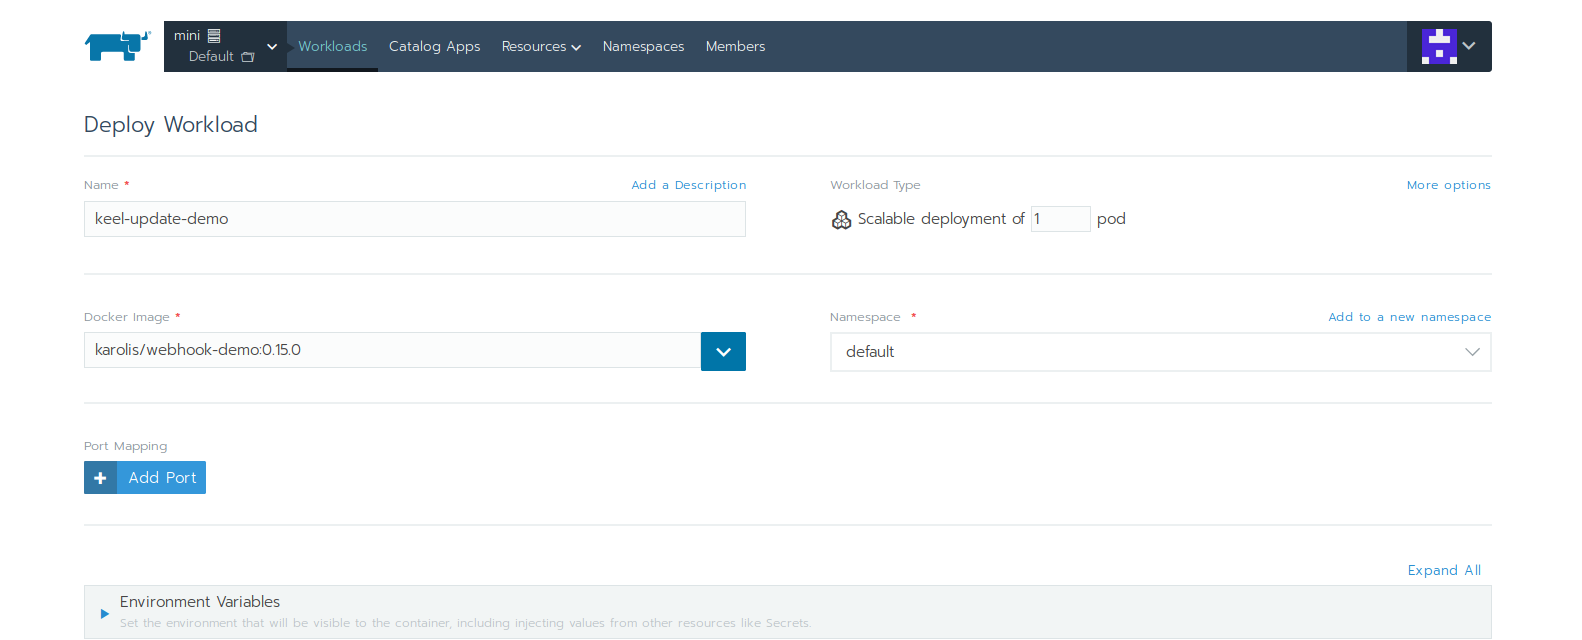
Don't set Labels or Annotations through the Rancher's UI as they will be set to the pod spec instead of the deployment. If they are in the pod spec - Keel will not detect them!
Deploy it and then from the workload options select 'View/Edit YAML':
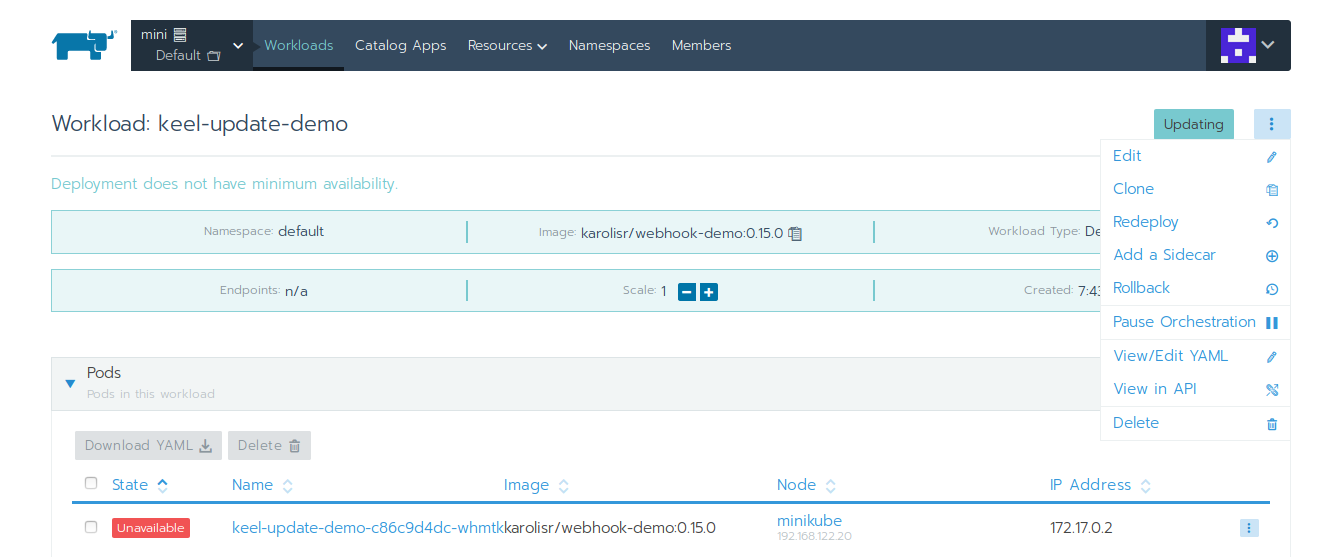
Here, Rancher created a deployment specification for us but we will need to specify an update policy. Use either labels or annotations (Keel supports annotations from 0.13.0-rc1 version) to specify the policy:
apiVersion: apps/v1beta2
kind: Deployment
metadata:
  annotations:
    deployment.kubernetes.io/revision: "1"
    field.cattle.io/creatorId: user-pxt5q
    keel.sh/policy: major  # <- this one!
There are other policies available, such as:
- Semver -
patch,minor,major,all. - Glob -
glob:build-*will update when new tags such asbuild-10,build-11are created where*can be anywhere in the tag. - Regex -
regexp:^([a-zA-Z]+)$.
Pushing new version
In my case I have a simple Makefile to push images:
TAG = 0.16.0

build:
    CGO_ENABLED=0 GOOS=linux go build -a -tags netgo  -ldflags  -'w' -o webhook-demo .

image: build
    docker build -t karolisr/webhook-demo:$(TAG) -f Dockerfile .

push: image
    docker push karolisr/webhook-demo:$(TAG)
After the push, we should see our workload updated:

Also, in Webhook Relay logs page you can see the webhooks
A little FAQ
Q: Can I set annotations/labels through the Rancher's web UI when I am creating a new workload? A: Unfortunately those end up in a pod spec and not the deployment so Keel won't detect them and auto updates won't work.
**Q: Do I always need to use Webhook Relay? ** A: Of course not, it just helps with scenarios where Keel is not reachable by the DockerHub or any other registry (private network, localhost)
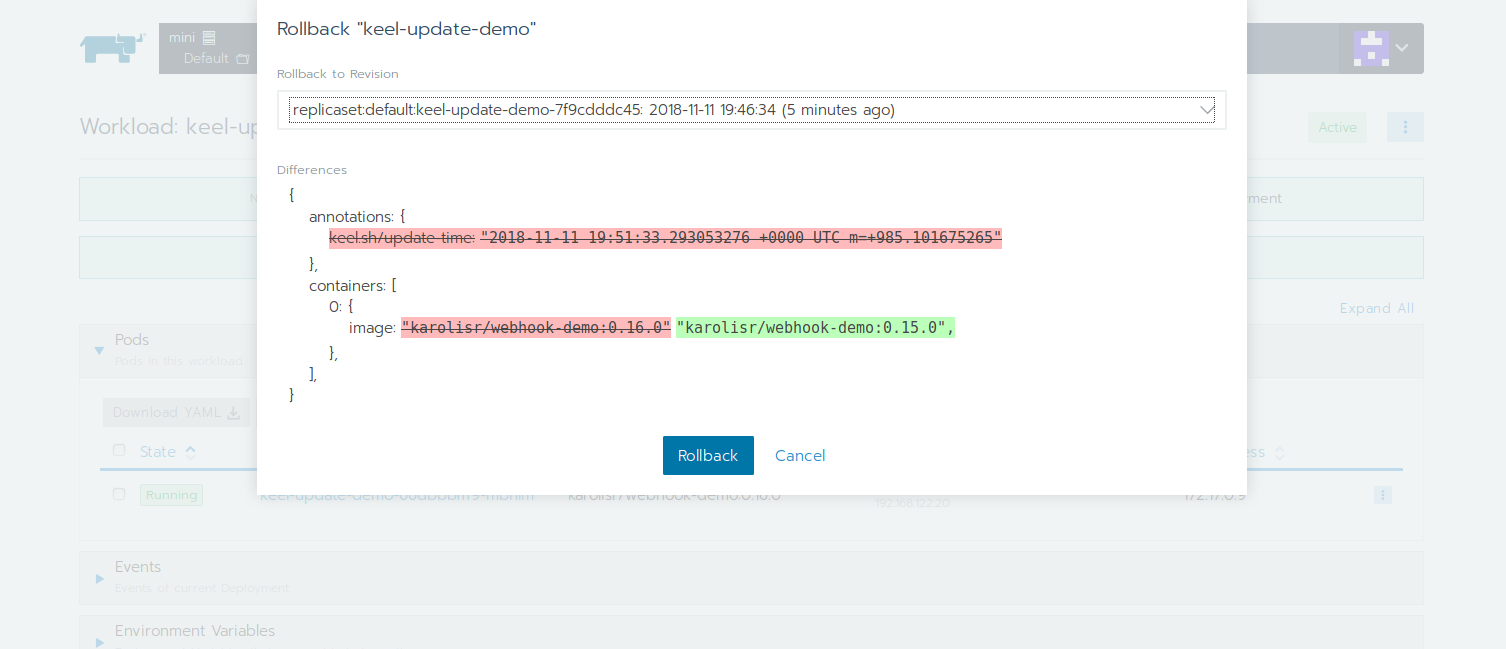
Q: What happens if something breaks? A: Keel is event driven so you can easily go to your Rancher's UI and do a rollback:
