Introducing Cloudflare support for Home Assistant remote access
Webhook Relay Home Assistant remote access add-on now support Cloudflare Domains

Today we are expanding Webhook Relay's Home Assistant add-on support for portability across different domains by announcing integration with Cloudflare API to create and manage DNS records. This means that you can transfer your domain management to Cloudflare and start enjoying new capabilities. Cloudflare has also recently announced their registrar so instead of just managing your records (they are doing it for free) and providing great proxy that speeds up your websites, you can now fully transfer your domain to them and avoid increasing prices from your original registrar.
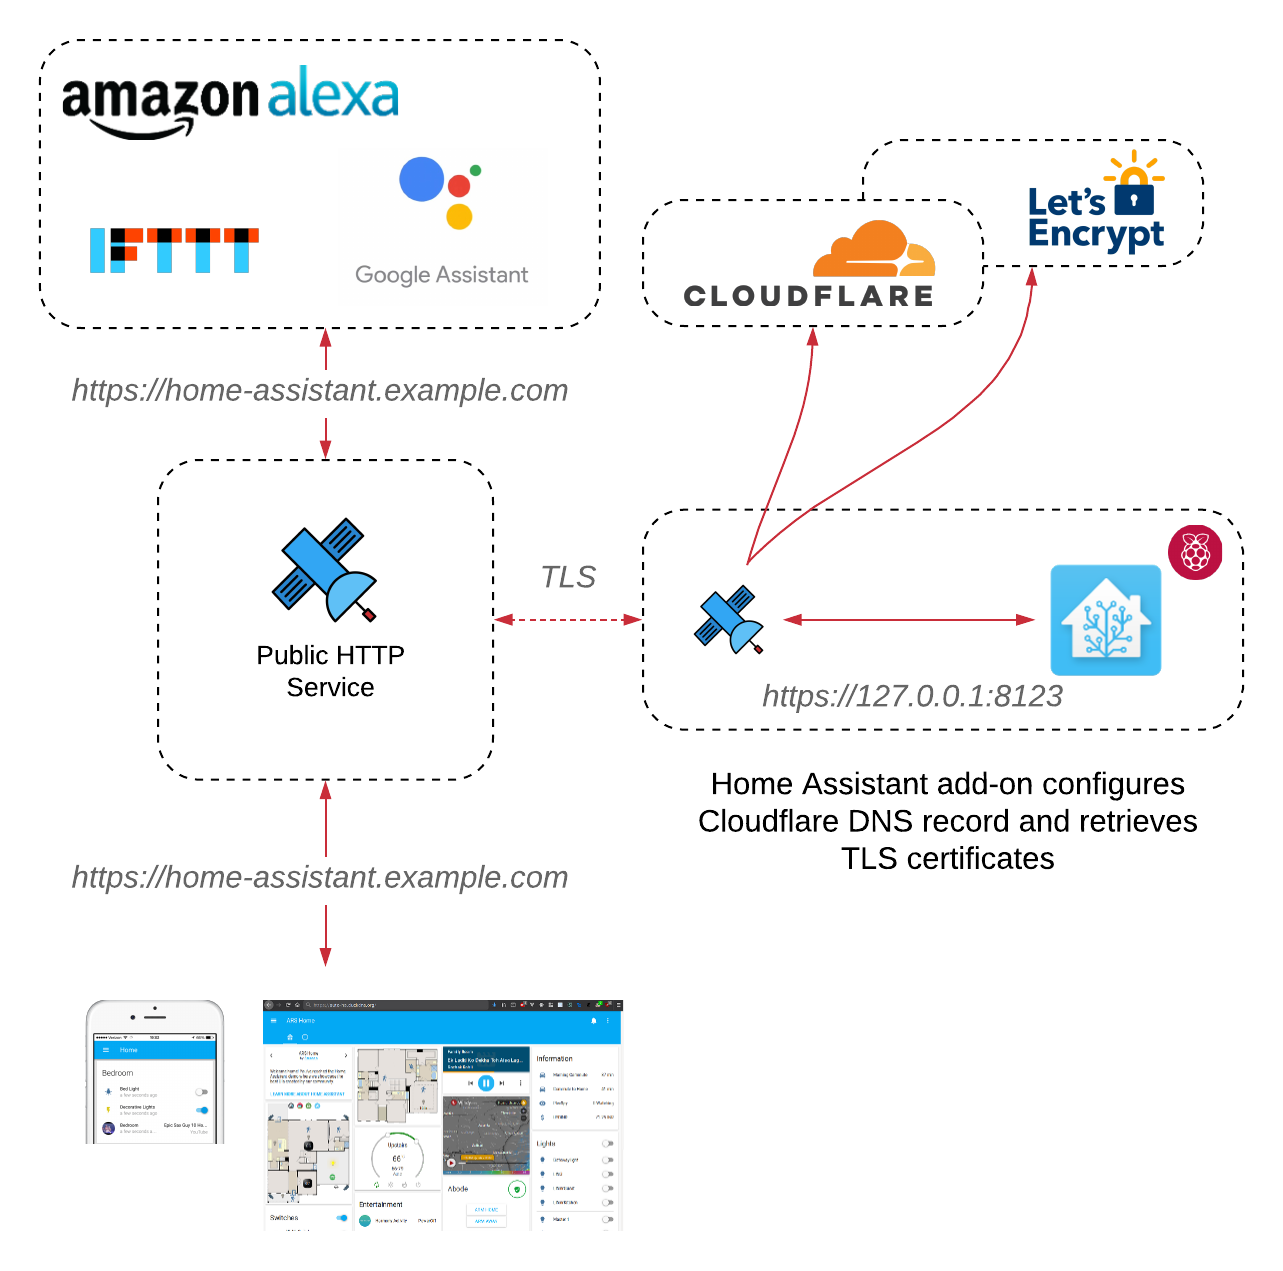
Webhook Relay Home Assistant add-on is a lightweight service that creates fast and secure tunnels for remote connection. It empowers users and expands their choice when ISPs or routers prevent incoming connections. With this add-on users can easily use Alexa, Google Home, IFTTT and many other automation services that require your Home Assistant be reachable from the internet. Add-on itself is a single executable, just 7MB size and barely uses any CPU & RAM, making it an ideal option when running on low power devices.
With Cloudflare integration, other than allowing you to have any domain names with TLS pass-through tunnels, you get some additional benefits:
- Minification - Remove unwanted characters like whitespaces, comments, new line characters and block delimiters which are not needed for a web page to serve.
- Cloud WAF - WAF (Web Application Firewall) helps to keep your site secure from OWASP top 10, CMS (WordPress, Joomla, etc. ) vulnerabilities. Cloudflare WAF has got more than 145 rules to protect you from almost all types of web applications attack.
- Browser Caching
- Optimized Network Routing
Getting Started
Add-on is installed in a same way as before (you can follow official documentation on it). The only difference now is that you will need to get a Cloudflare API key. Follow these instructions, or:
- Login to the Cloudflare account.
- Go to My Profile.
- Scroll down to API Keys and locate Global API Key.
- Click API Key to see your API identifier.
Note that your Cloudflare API will always remain on the device and will never be shared with Webhook Relay cloud service.
Now, set:
- Webhook Relay key and secret from tokens page
- Cloudflare email and API key
- your tunnel domain
{
    "key": "[YOUR TOKEN KEY]",
    "secret": "[YOUR TOKEN SECRET]",
    "forwarding": [
    ],
    "tunnels": [{
        "name": "home-assistant",
        "destination": "http://127.0.0.1:8123/",
        "protocol": "tls",
        "domain": "home-assistant.example.com",
        "provider": "cloudflare"
    }],
    "duck_dns": {
        "token": "",
        "accept_terms": false
    },
    "cloudflare": {
        "email": "[email protected]",
        "api_key": "[YOUR CLOUDFLARE API KEY]"
    },
    "tunnels_enabled": true,
    "forwarding_enabled": false
}
Don't forget to set the new "provider": "cloudflare" field in the tunnel configuration.
Commitment to portability and privacy
We released multi-architecture add-on with the initial 1.0.0 release that can work in any environment, as long as it can connect to the public Webhook Relay servers. These agents are now running from low-power Raspberry Pi devices to high-performance servers, providing secure tunnels. With TLS pass-through tunnels we created an easy to use, secure by default tunnels where the agent is doing the heavy-lifting of ensuring TLS certificates and decrypting traffic. In this configuration, Webhook Relay servers can only see encrypted traffic ensuring maximum privacy.
Webhook Relay is a modern tunnelling service available on multiple architectures and providing both free and paid tiers. Self-hosted & enterprise are available. Follow us on Twitter @webhookrelay.

