Automated Jenkins builds on GitHub pull request
Configuration example on how to automatically start builds on GitHub pull request

In this short guide we will configure Jenkins to start builds on GitHub pull requests. Subsequent builds will be triggered on any new commits and GitHub pull request status will show whether build succeeded or failed. This setup will work without configuring router, firewall or having a public IP. It will also work behind a corporate firewall.
Getting a VM
In my case, I just grabbed a Vagrant box from https://app.vagrantup.com/ubuntu/boxes/xenial64:
Vagrant.configure("2") do |config|
  config.vm.box = "ubuntu/xenial64"
  config.vm.network "private_network", type: "dhcp"
end
Then:
vagrant up
vagrant ssh
And we have our VM. You can get the IP address by typing ifconfig in the terminal.
Installing Jenkins
I mostly followed this guide https://linuxize.com/post/how-to-install-jenkins-on-ubuntu-18-04/. The only caveat I encountered this time with Jenkins, was the jdk version mismatch.
Connecting to Jenkins
First, get your Jenkins token:
cat /var/lib/jenkins/secrets/initialAdminPassword
ce04d19270934633a7badcac3cfac316
Then, either open your node firewall (or check Vagrant port forwarding) or do the easy thing: connect with the relay:
Get CLI
To get the CLI, check instructions here. On a 64-bit Linux OS it's:
curl -sSL https://storage.googleapis.com/webhookrelay/downloads/relay-linux-amd64 > relay \
   && chmod +wx relay && sudo mv relay /usr/local/bin
Login
Go to https://my.webhookrelay.com/tokens, click CREATE TOKEN and copy/paste login command into the terminal, it should be something like:
relay login -k <your key> -s <your secret>
Start tunnel
$ relay connect :8080
Connecting:
http://lsw7eq49jlhsuldvhpiyku.webrelay.io <----> http://127.0.0.1:8080
https://lsw7eq49jlhsuldvhpiyku.webrelay.io <----> http://127.0.0.1:8080
Now, open the browser. You should see a similar screen:
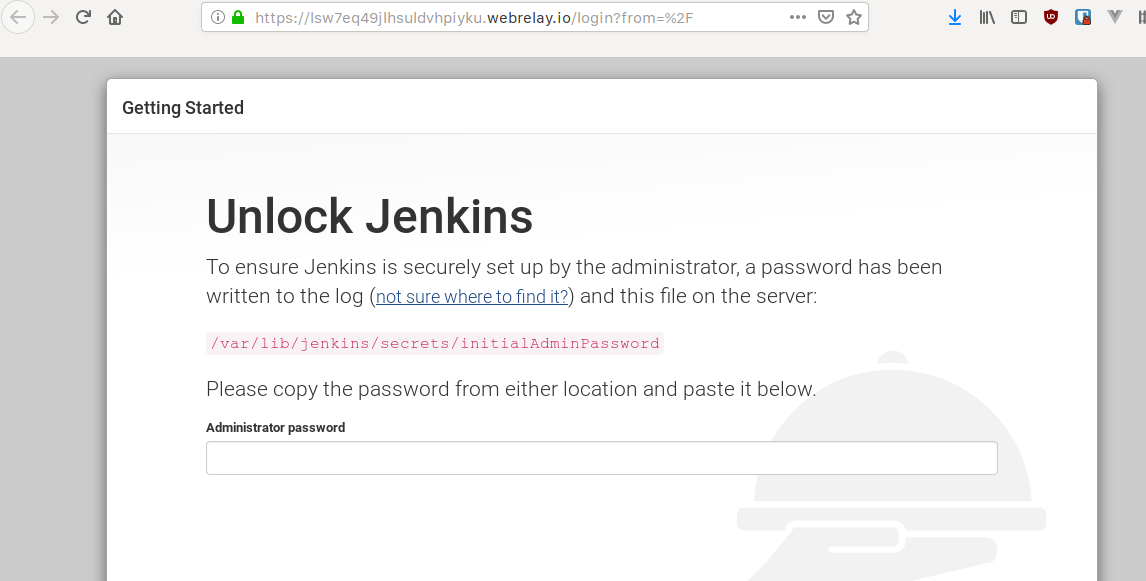
Follow the steps to configure your Jenkins initial admin user.
Installing the plugin
Plugin installation instructions can be found here.
Once you have it, add GitHub credentials - your username and GitHub token.
Forwarding configuration
Go to your bucket configuration and create a bucket called github-webhooks. Configure it to forward all webhooks to http://localhost:8080/. This will ensure that webhooks will reach Jenkins server.
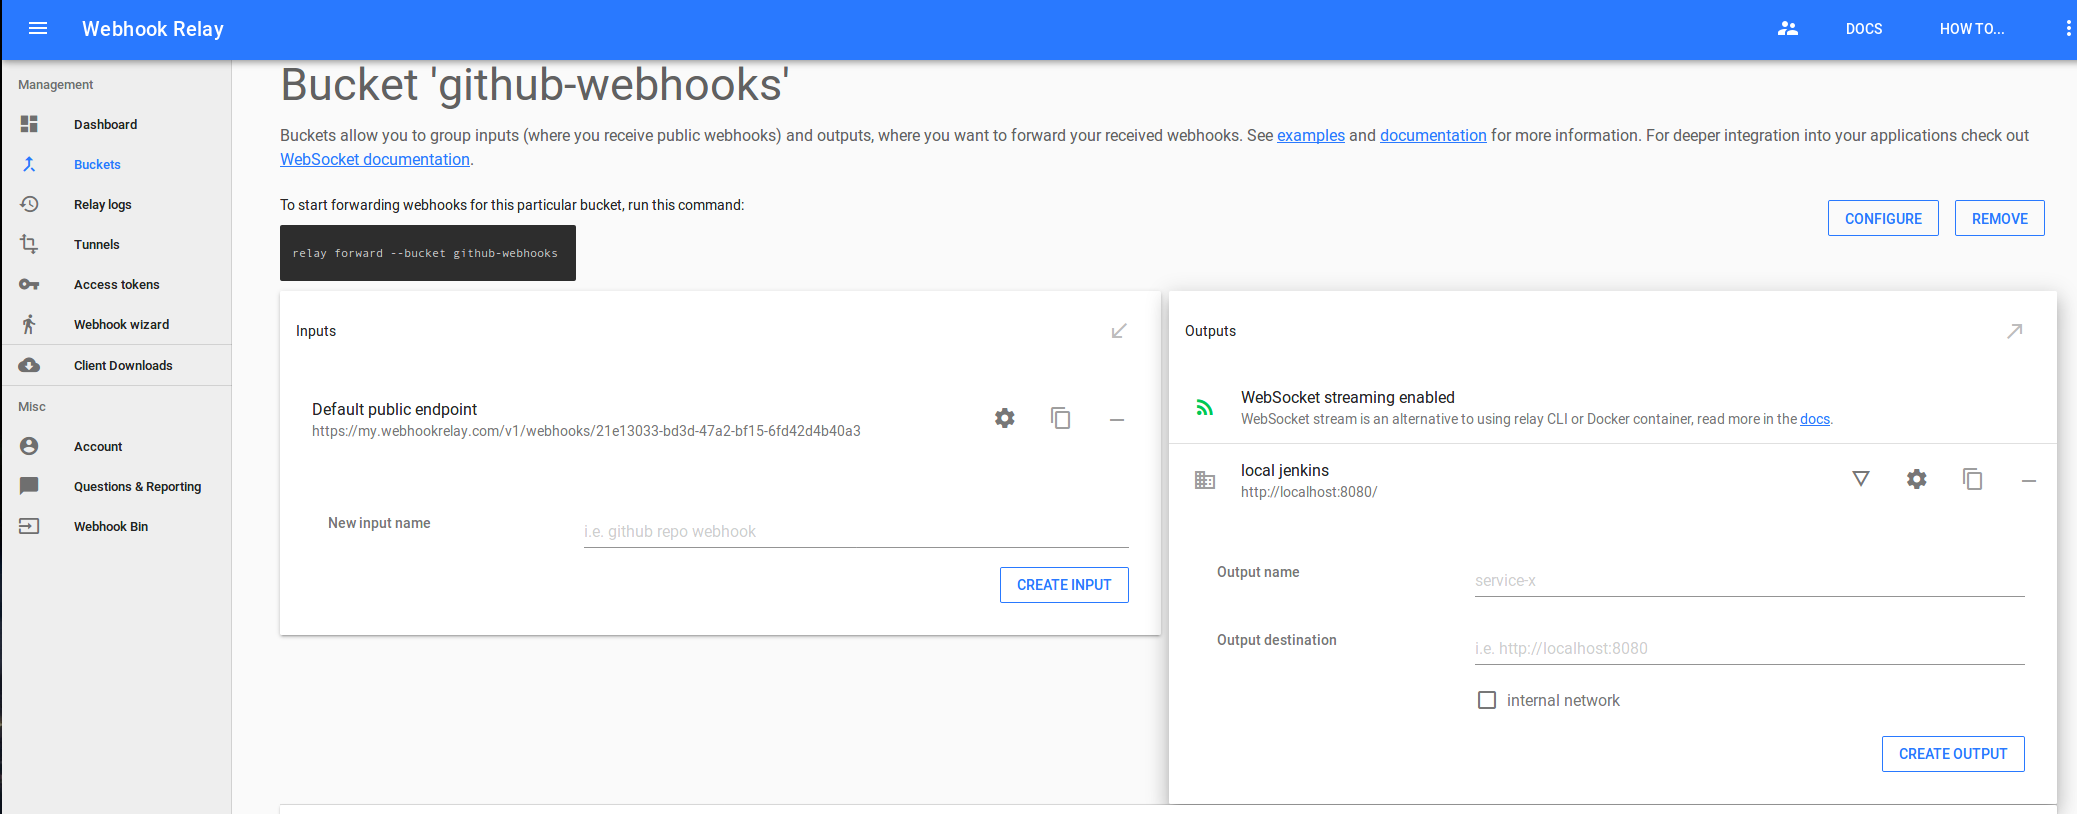
Once you have the relay CLI on the machine where you run Jenkins, type:
relay forward --bucket github-webhooks
This will start forwarding webhooks. There are alternative options to run the forwarding daemon, such as Docker container.
If you are creating webhook configuration manually in GitHub, use http://localhost:8080/ghprbhook destination as it's the endpoint on which the plugin is listening for webhooks. In default case, Jenkins will automatically transform https://my.webhookrelay.com/v1/webhooks/21e13033-bd3d-47a2-bf15-6fd42d4b40a3 endpoints to https://my.webhookrelay.com/v1/webhooks/21e13033-bd3d-47a2-bf15-6fd42d4b40a3/ghprbhook and Webhook Relay will preserve the extra
/ghprbhookpath.
Now, configure GitHub Pull Request Builder:

Creating a job
To create a new job, first select "Freestyle project", then:
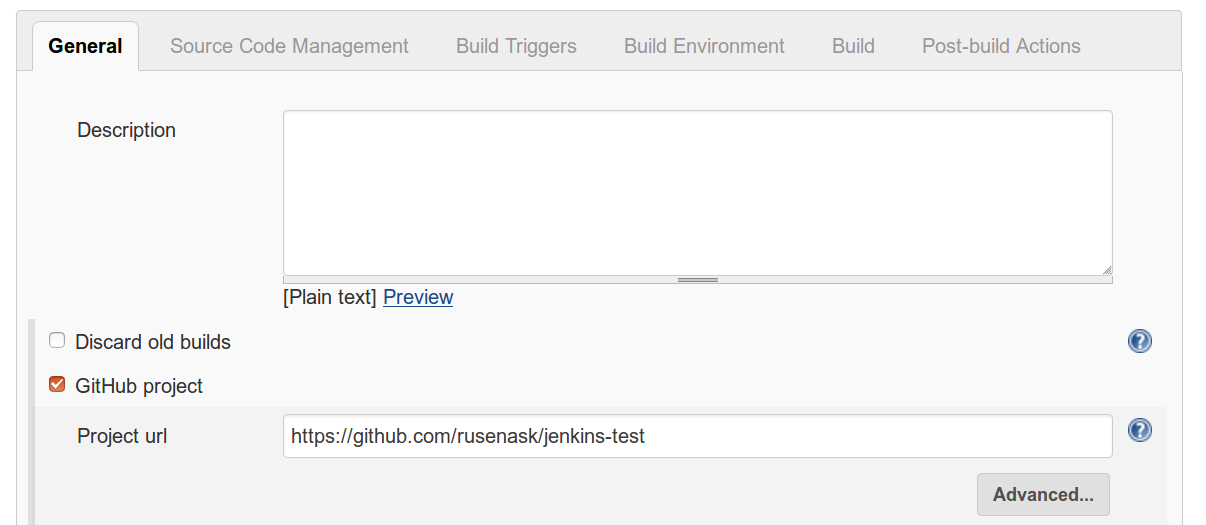
Add the project's GitHub URL to the "GitHub project" field (the one you can enter into browser. eg: "https://github.com/rusenask/jenkins-test/"):
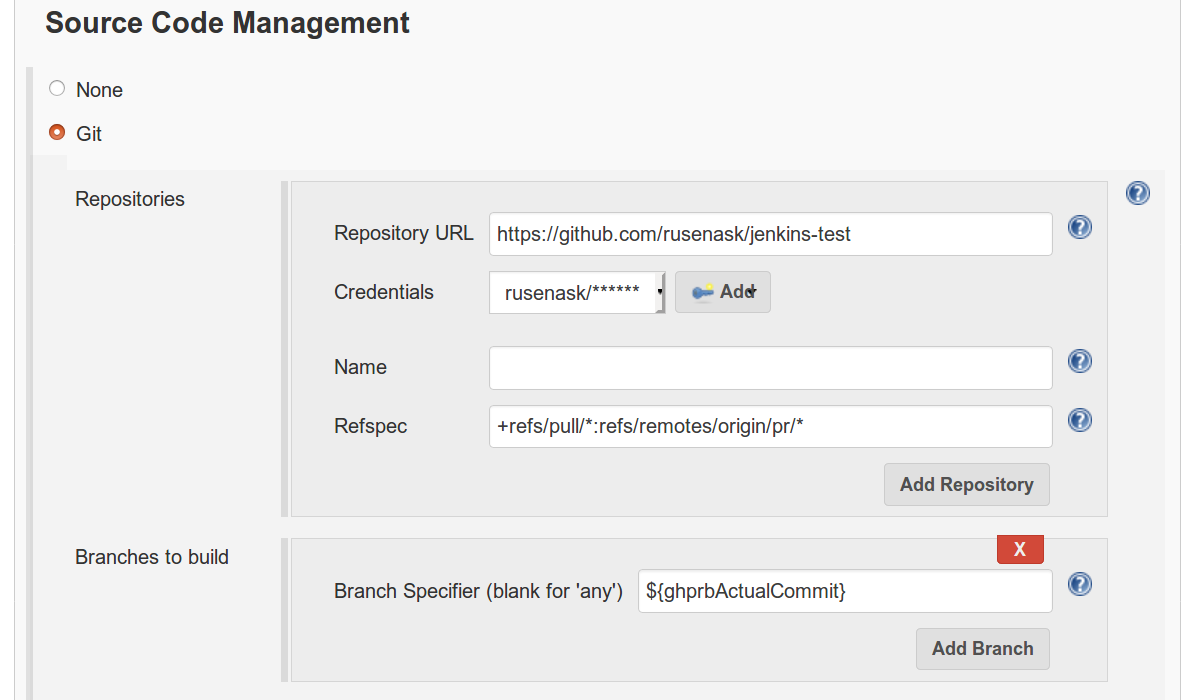
Configure Source Code Management section:
- Select Git SCM.
- Add your GitHub "Repository URL".
- Under Advanced, set "refspec" to
+refs/pull/*:refs/remotes/origin/pr/* - In "Branch Specifier", enter
${ghprbActualCommit}
Configure Build Triggers with a list of admins and tick the use github hooks for build triggering:
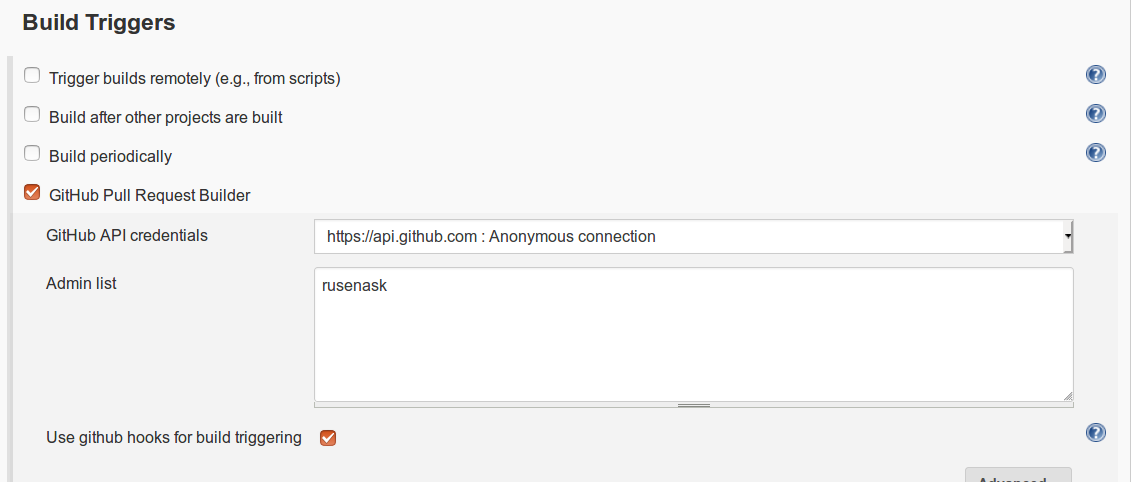
Add your Build step configuration. This can be anything you want, usually people tend to use either a bash script, Makefile target or something specific to your programming language such as go build:

Opening a PR
Now, whenever you open a new pull request in GitHub, you should see a build being triggered:
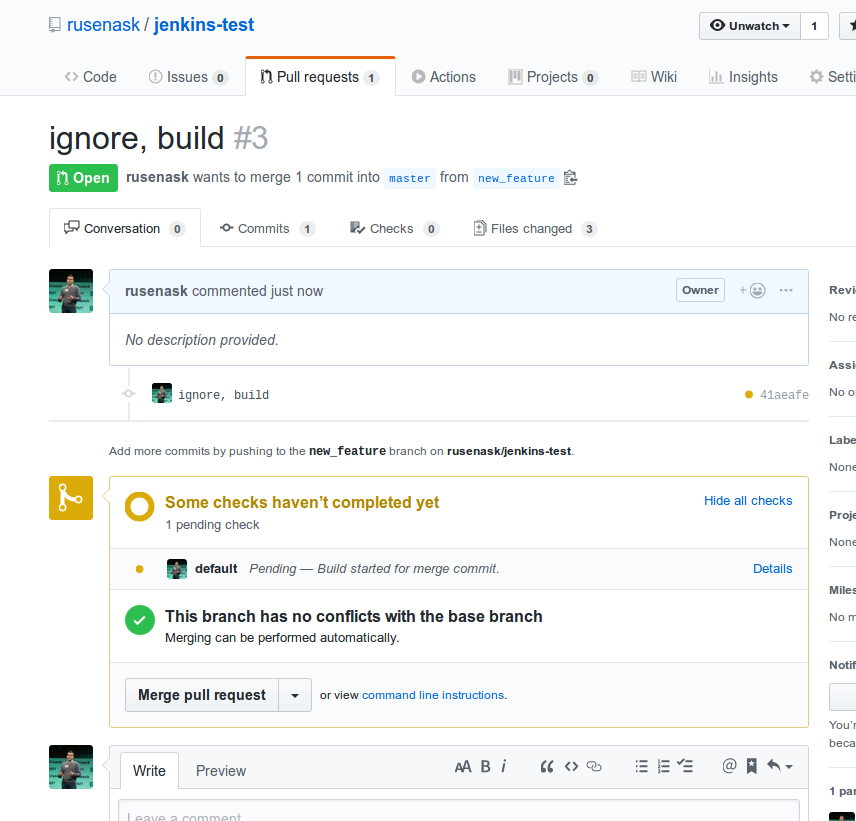
You can view build status in your Jenkins instance as well. This build indicator in GitHub will either turn red or green based on the build status.
Conclusion
As we can see, there are several required steps to make sure your PRs get automatically built and tested when using Jenkins. Those can be split into two groups:
- System configuration that involves:
- setting Webhook Relay agent to forwarding webhooks
- installing and configuring GitHub pull request builder plugin
- Whenever you create a new project in Jenkins, setting up few settings. The first time I did this it took me some time to go through the configuration options, but second and third time didn't take more than 1 minute :)
I hope you will find this guide useful!
P.S. Bonus troubleshooting below:
When we are talking about Jenkins, there are many ways for things to go wrong. Multiple plugin versions, corporate proxies and different operating systems contribute to all of this. I have compiled a short list of items for you to check if you encounter problems.
Ensuring webhook configuration
Make sure there's an automatically created GitHub repository webhook configuration:
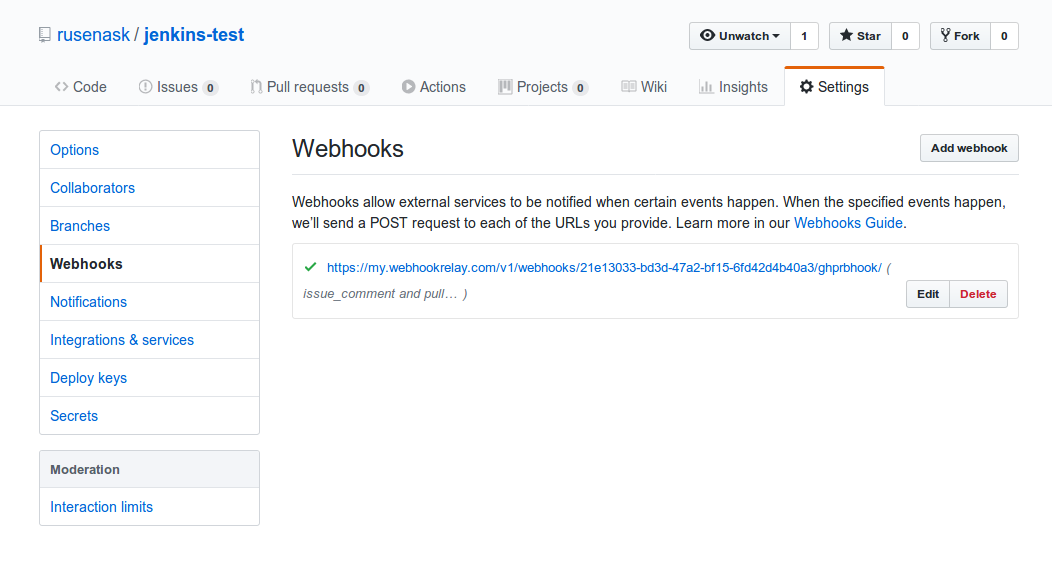
Ensuring Webhook Relay agent can connect
Normally, connected agent should look like this:
relay forward --bucket github-webhooks
Filtering on bucket: github-webhooks
Starting webhook relay agent...
1.55523552627511e+09    info    using standard transport...
1.5552355264042027e+09  info    webhook relay ready...  {"host": "my.webhookrelay.com:8080"}
If you are behind a corporate proxy, try adding --ws flag to change default transport type from GRPC to WebSocket:
relay forward --ws --bucket github-webhooks
Filtering on bucket: github-webhooks
Starting webhook relay agent...
1.5552387754607065e+09  info    using websocket based transport...
1.5552387754607568e+09  info    authenticating to 'wss://my.webhookrelay.com:443/v1/socket'...
1.5552387754608495e+09  info    websocket reader process started...
1.555238775470567e+09   info    subscribing to buckets: [github-webhooks
Check logs
There will be several sources of logs you can check out:
- Jenkins logs under
/log/all:
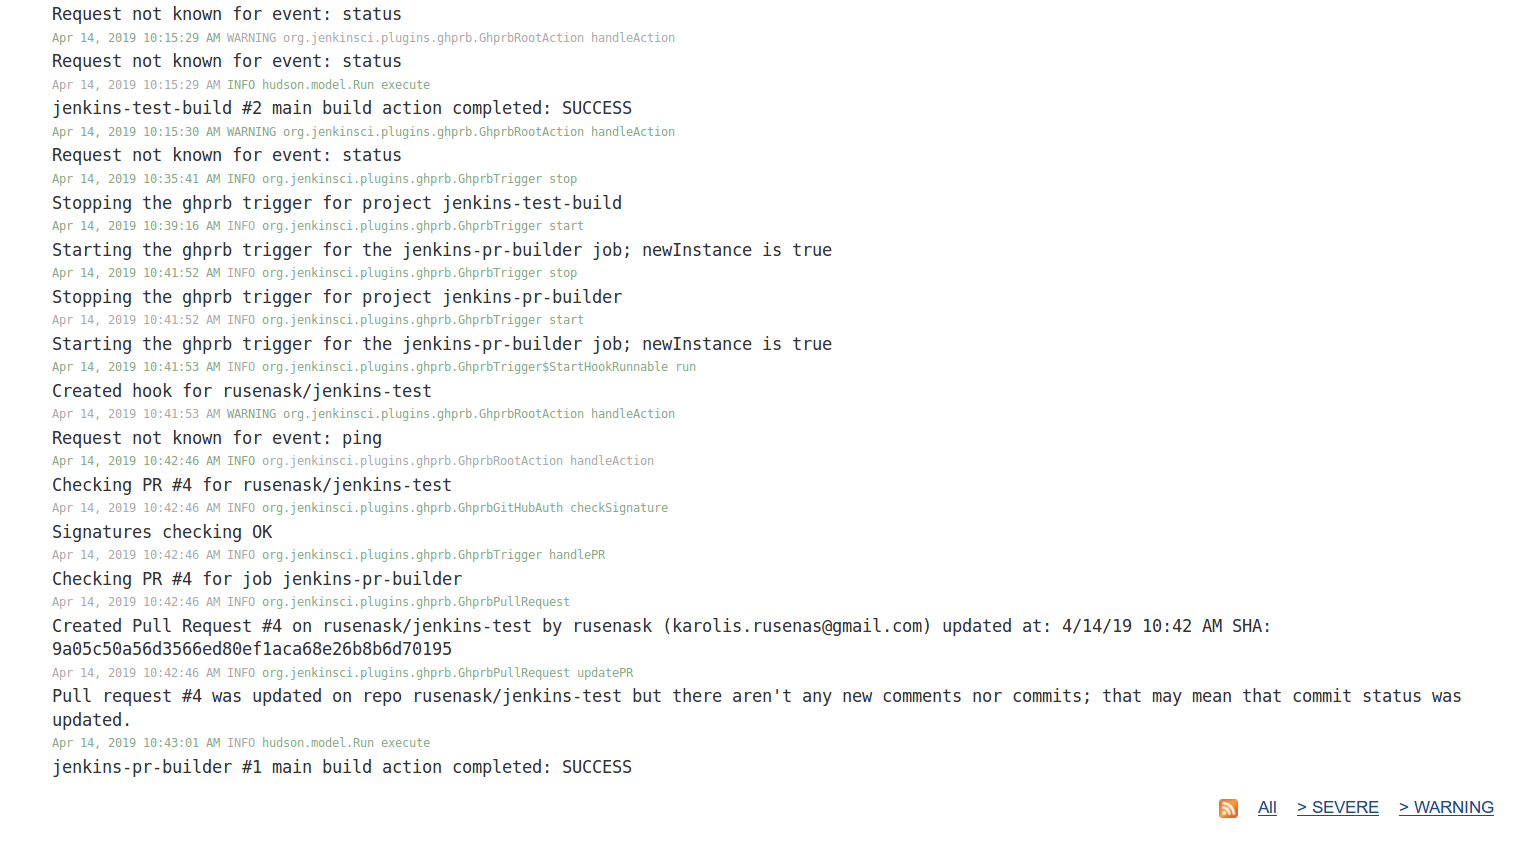
- Webhook Relay forwarding logs:

- CLI logs:
relay forward --bucket github-webhooks
Filtering on bucket: github-webhooks
Starting webhook relay agent...
1.55523552627511e+09    info    using standard transport...
1.5552355264042027e+09  info    webhook relay ready...  {"host": "my.webhookrelay.com:8080"}
1.555236773074343e+09   info    webhook request relayed {"destination": "http://localhost:8080/ghprbhook/", "method": "POST", "bucket": "github-webhooks", "status": 200, "retries": 0}
1.5552368184301443e+09  info    webhook request relayed {"destination": "http://localhost:8080/ghprbhook/", "method": "POST", "bucket": "github-webhooks", "status": 200, "retries": 0}
1.5552368215106862e+09  info    webhook request relayed {"destination": "http://localhost:8080/ghprbhook/", "method": "POST", "bucket": "github-webhooks", "status": 200, "retries": 0}
1.555236829308788e+09   info    webhook request relayed {"destination": "http://localhost:8080/ghprbhook/", "method": "POST", "bucket": "github-webhooks", "status": 200, "retries": 0}
1.5552368314174337e+09  info    webhook request relayed {"destination": "http://localhost:8080/ghprbhook/", "method": "POST", "bucket": "github-webhooks", "status": 200, "retries": 0}
1.555236920064973e+09   info    webhook request relayed {"destination": "http://localhost:8080/ghprbhook/", "method": "POST", "bucket": "github-webhooks", "status": 200, "retries": 0}
1.5552369202506151e+09  info    webhook request relayed {"destination": "http://localhost:8080/ghprbhook/", "method": "POST", "bucket": "github-webhooks", "status": 200, "retries": 0}

