Static IPs for webhook calls to enable whitelisting
How to setup static IPs for webhook calls to enable whitelisting
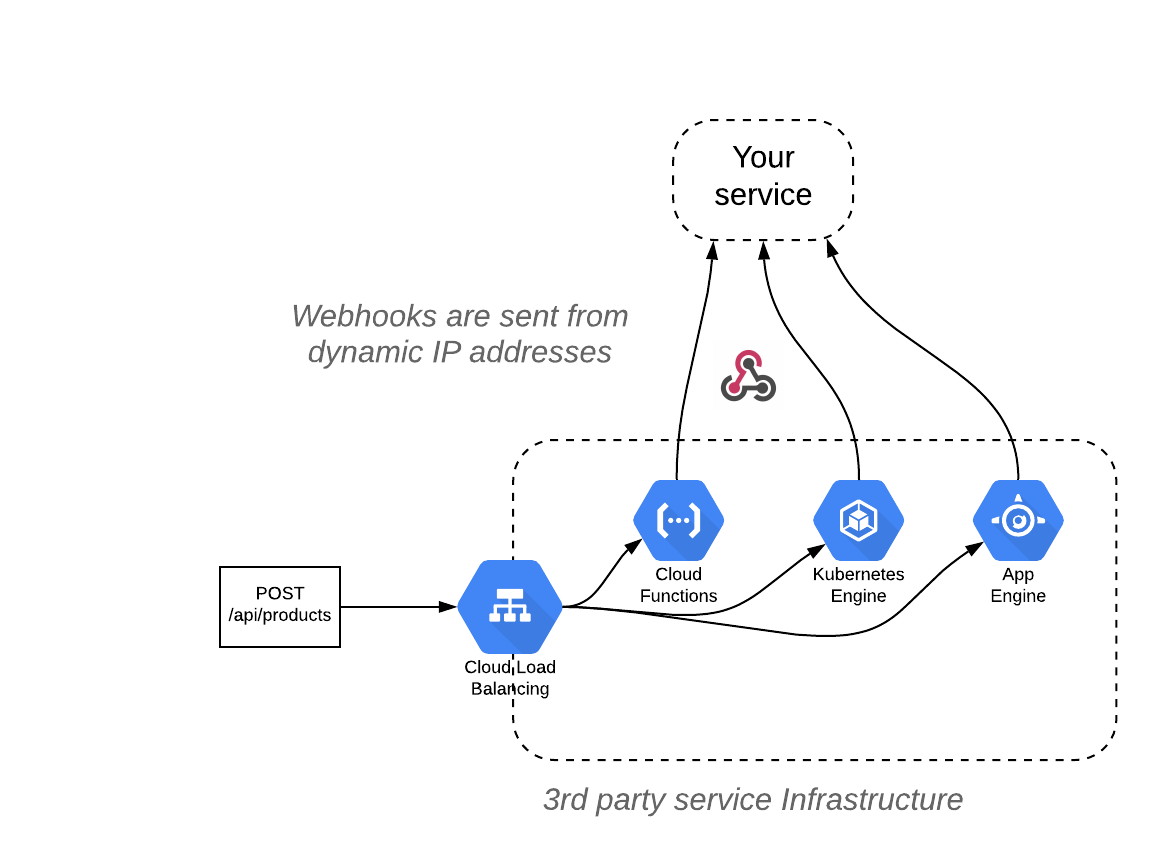
Quite often corporate firewalls only allow incoming webhooks from whitelisted IPs and many public services can't provide them due operational complexity. The complexity for egress traffic usually comes from a modern infrastructure where servers are treated as cattle, not pets. Servers don't have static IPs and only rely on a cloud load balancer that accepts ingress traffic and then routes to servers running in private network. Updates are often done by provisioning a whole new pool of nodes and gradually draining the old one.
Generated webhooks can be coming from services that are running on various backends:

Solutions for the webhook producer
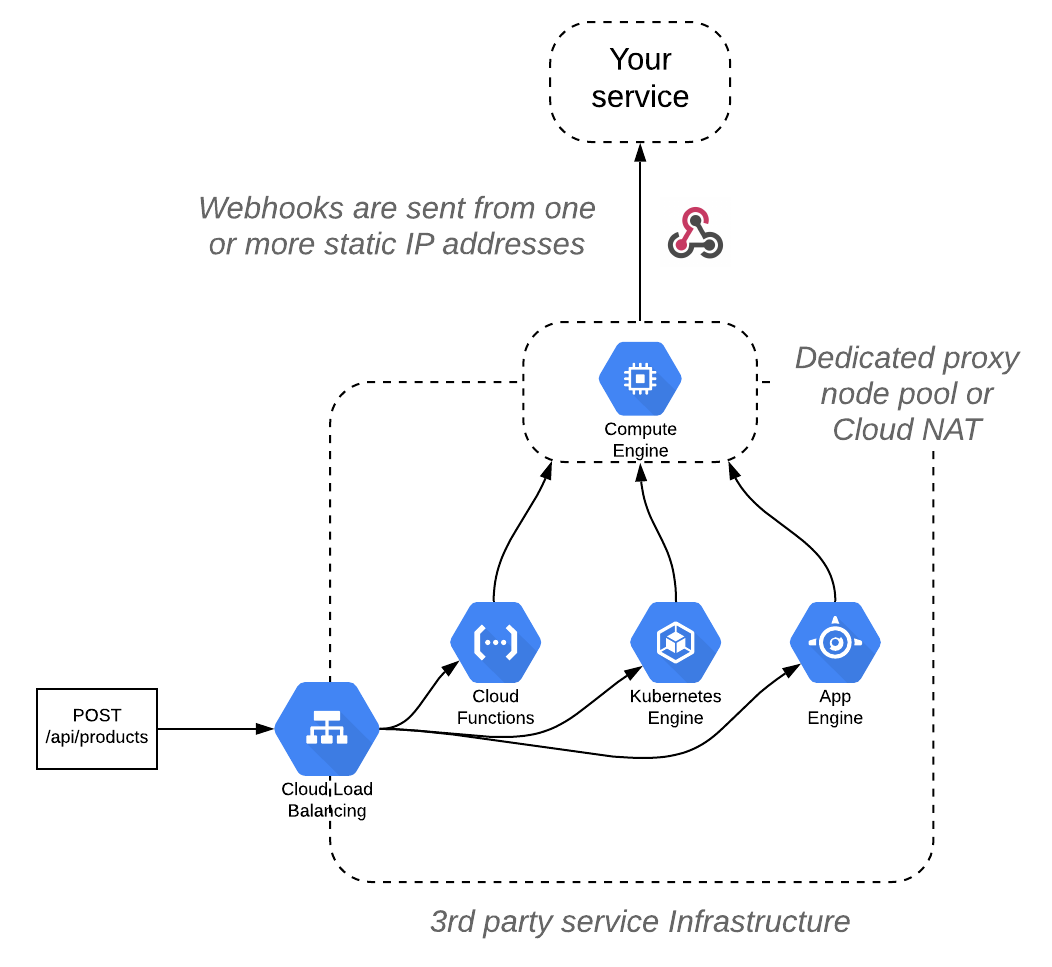
To provide a static set of IP address for outgoing connections (so your firewall can whitelist them) a company that runs on cloud infrastructure (such as Kubernetes or serverless infrastructure like AWS Lambda) needs to use cloud provider services like Cloud NAT on GCP, Internet Gateway on AWS that route outgoing traffic (which can be a lot) or set up their own dedicated group of instances that will forward all requests:

So, we can see that from the webhook producer there are definitely multiple ways to achieve it. However, with the Cloud NAT on GCP it can be quite costly since they would route all traffic through it. And with a separate pool of nodes they would now have to manage a pool of nodes (update OS, update software, update configuration, etc.) for very little added value from their end.
This can explain why with time fewer services are providing a set of external static IPs for organizations to whitelist. A more common way (and probably better) to ensure that webhooks are coming from the correct source is with payload signatures. Some good examples are Github: https://developer.github.com/webhooks/securing/ and Stripe: https://stripe.com/docs/webhooks/signatures.
Solution for the webhook receiver (relay agent as a proxy)
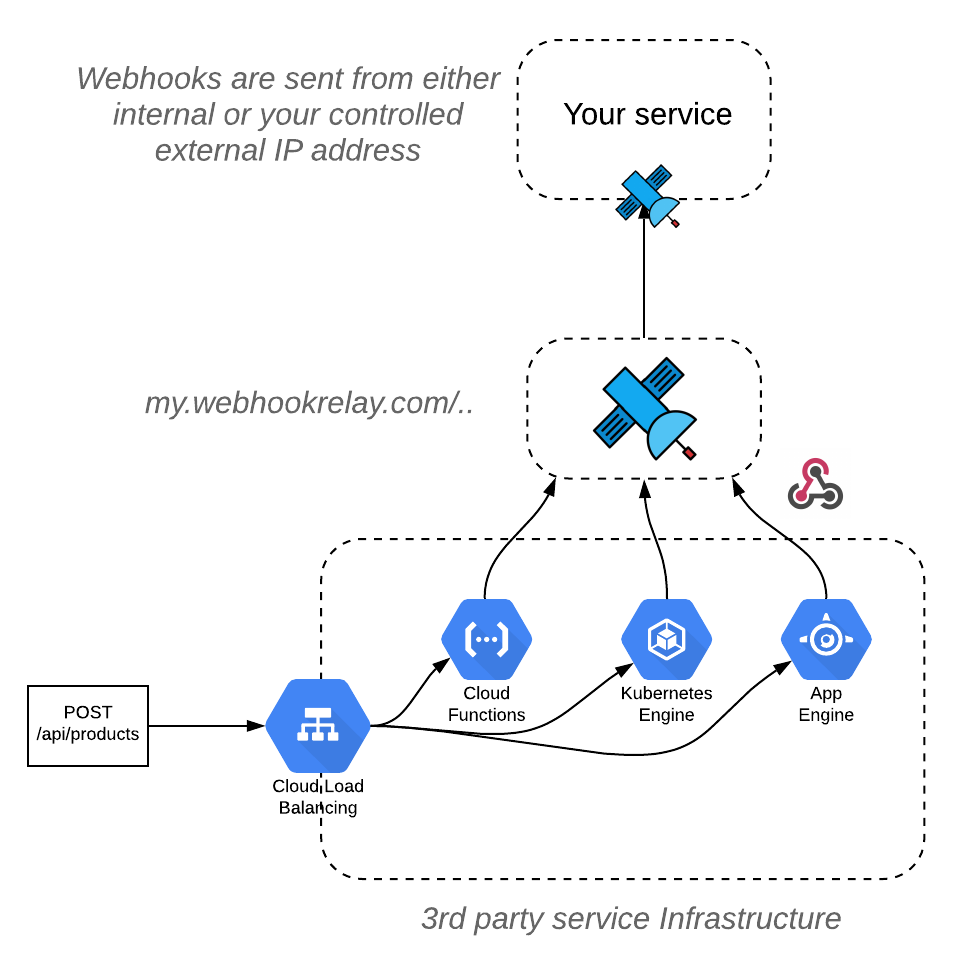
One of the solutions that we will demonstrate today will be to use Webhook Relay to accept and forward webhooks from an internal or your controlled static external IP. With internal IP it's simple, you can choose an installation method that you prefer here but in this guide we will deploy your controlled GCP server that will act as a relay for all webhooks:

Pros of this setup:
- No responses are returned from the destination (unless you explicitly turn them on)
- Many services can be using the same relay agent as a proxy, just create more buckets with their own inputs and outputs
- You get the history of webhook calls for debugging/audit
- Relay agent is stateless so you can delete and recreate that VM at any time
Prerequisites
Before we begin, ensure that you have these tools ready:
- Terraform - download from here
- gcloud - download from here
- git - download from here
- Webhook Relay account - register here
Clone repository
Clone our Terraform repository:
git clone https://github.com/webhookrelay/relay-tf.git
cd relay-tf
Initialize Terraform modules & authentication
Go into the 'gcp' directory:
cd gcp
Initialize terraform modules:
terraform init
Authenticate to your GCP account:
gcloud auth application-default login
Instructions how to use service account can be found here: https://www.terraform.io/docs/providers/google/guides/getting_started.html#adding-credentials.
Set variables
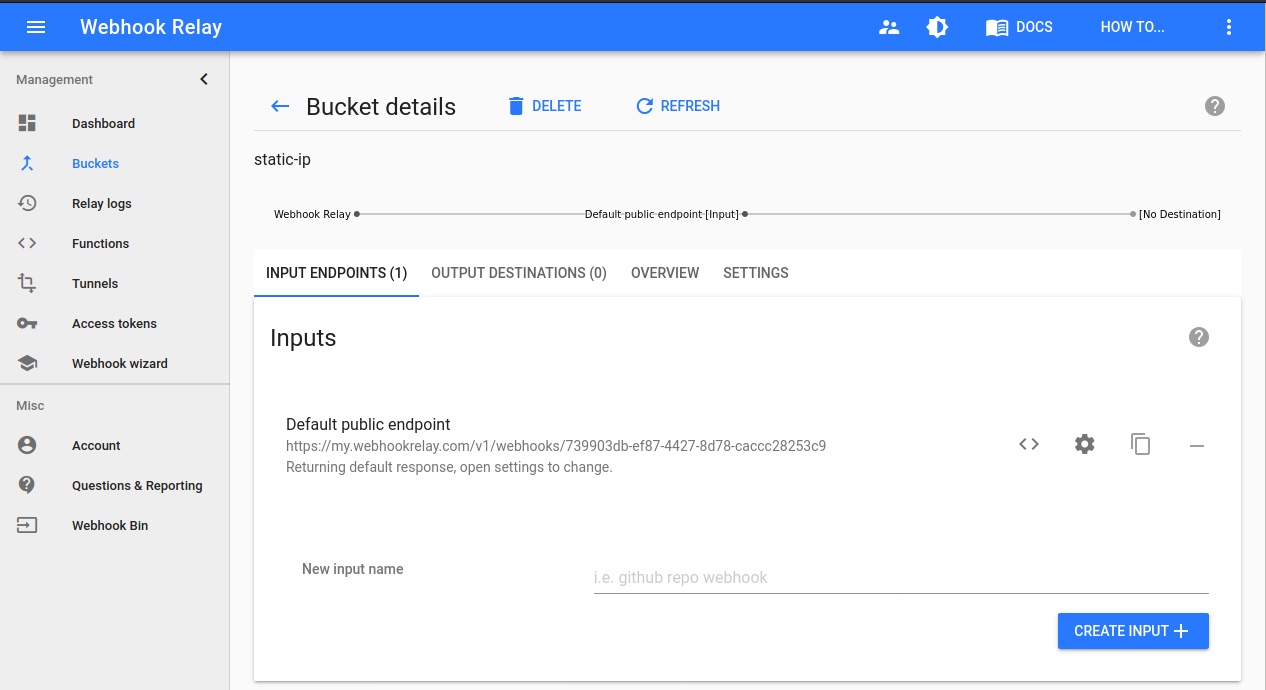
Let's first create a bucket called static-ip here https://my.webhookrelay.com/buckets:

Then, create an output. Make sure 'internal' is chosen to route webhooks through our GCP agent. For the sake of this example we will point the output destination at http://ifconfig.co/json to get our IP address:

Then, go to the access token page here https://my.webhookrelay.com/tokens and click "Create Token". You will need these details for the terraform inputs file.
Create a new inputs.tfvars using your favorite text editor, and put the following in it:
project                = "<your google project id>"
relay_key              = "<key from https://my.webhookrelay.com/tokens>"
relay_secret           = "<secret from https://my.webhookrelay.com/tokens>"
relay_buckets          = "static-ip"
Terraform it!
Now, to deploy relay agent:
terraform apply -var-file inputs.tfvars
It will print out ssh command (that you can use to get into the instance) and external IP:
Outputs:

external_ip_address = 35.185.28.228
gcloud_ssh = gcloud beta compute ssh --zone us-east1-b relay-agent-vm-c34ded9a750faf93 --project webhookrelay
Testing it
Now, if you send requests to your bucket's input with a curl (or any other client, in real world scenario it will be sent by the webhook producer's service):
curl https://my.webhookrelay.com/v1/webhooks/739903db-ef87-4427-8d78-caccc28253c9
they will be dispatched to the destination through the GCP server and therefore have "35.185.28.228" (different if you have provisioned it yourself) IP. This way you can whitelist webhook source or just ensure that you deploy Webhook Relay agent with terraform into an existing private network.
You can view the response from the http://ifconfig.co/json service in your bucket details page:

Which shows that the IP was in fact our external IP from the agent (35.185.28.228):
{
    "ip": "35.185.28.228",
    "ip_decimal": 599334116,
    "country": "United States",
    "country_eu": false,
    "country_iso": "US",
    "hostname": "228.28.185.35.bc.googleusercontent.com",
    "latitude": 38.6583,
    "longitude": -77.2481,
    "asn": "AS15169",
    "asn_org": "GOOGLE",
    "user_agent": {
        "product": "curl",
        "version": "7.65.3",
        "raw_value": "curl/7.65.3"
    }
}
That's it, if you would like to learn more about Webhook Relay, check out our docs, examples and this blog :)

