
Archive AWS GuardDuty Findings to GCP Cloud Storage
Route AWS GuardDuty security findings to Google Cloud Storage using Webhook Relay Service Connections for long-term retention and cross-cloud analysis
AWS GuardDuty monitors your AWS accounts for malicious activity and unauthorized behavior. But what if your analytics stack lives in GCP? Maybe you run BigQuery for security analysis or Chronicle for SIEM. Getting GuardDuty findings into GCP usually means building custom Lambda functions, managing cross-cloud credentials, and maintaining glue code.
Webhook Relay Service Connections let you route GuardDuty findings to GCP Cloud Storage in minutes, no code required.
Architecture Overview
The data flow:
AWS GuardDuty → EventBridge → SQS Queue → Webhook Relay → GCP Cloud Storage
GuardDuty publishes findings to Amazon EventBridge. An EventBridge rule routes them to an SQS queue. Webhook Relay polls the queue and stores each finding as a JSON file in your GCS bucket.
You can also publish to AWS S3 if you prefer, just in this case we want to access them through BigQuery afterwards.
Why This Approach?
- No custom code. No Lambda functions to maintain, no credential rotation scripts, no deployment pipelines.
- Long-term retention. GCS lifecycle policies move findings to Coldline or Archive storage automatically. Keep years of security data cheaply.
- Analytics-ready. BigQuery can query your findings directly from GCS. Build dashboards, run threat hunting queries, or feed data into Chronicle.
- Reliable delivery. SQS provides durable message queuing. Webhook Relay handles retries.
AWS Setup
Step 1: Create an SQS Queue
First, create an SQS queue to receive GuardDuty findings:
- Go to AWS Console → SQS → Create queue
- Choose Standard queue type
- Name it
guardduty-findings - Keep default settings and create the queue
Copy the Queue URL. It looks like:
https://sqs.us-east-1.amazonaws.com/123456789012/guardduty-findings
Step 2: Create an EventBridge Rule
EventBridge routes GuardDuty findings to your SQS queue:
- Go to AWS Console → EventBridge → Rules → Create rule
- Name:
guardduty-to-sqs - Event bus:
default - Rule type: Rule with an event pattern
For the event pattern, select:
- AWS service: GuardDuty
- Event type: GuardDuty Finding
Or use this custom pattern to capture all GuardDuty findings:
{
  "source": ["aws.guardduty"],
  "detail-type": ["GuardDuty Finding"]
}
For the target:
- Target type: AWS service
- Select target: SQS queue
- Queue:
guardduty-findings
Create the rule. EventBridge will now route all GuardDuty findings to your SQS queue.
Step 3: Create an IAM User for Webhook Relay
Webhook Relay needs credentials to poll your SQS queue:
- Go to AWS Console → IAM → Users → Create user
- Name:
webhookrelay-sqs-reader - Attach a policy with these permissions:
{
  "Version": "2012-10-17",
  "Statement": [
    {
      "Effect": "Allow",
      "Action": [
        "sqs:ReceiveMessage",
        "sqs:DeleteMessage",
        "sqs:GetQueueAttributes"
      ],
      "Resource": "arn:aws:sqs:us-east-1:123456789012:guardduty-findings"
    }
  ]
}
- Create an access key and save the Access Key ID and Secret Access Key
GCP Setup
We will be using GCP GCS service connection for this.
Step 1: Create a GCS Bucket
- Go to GCP Console → Cloud Storage → Create bucket
- Name:
guardduty-archive(or your preferred name) - Choose your region and storage class
- Create the bucket
Step 2: Create a Service Account
- Go to GCP Console → IAM → Service Accounts → Create
- Name:
webhookrelay-gcs-writer - Grant the role: Storage Object Creator (
roles/storage.objectCreator) - Create a JSON key and download it
Webhook Relay Setup
Connect both clouds through Webhook Relay.
Step 1: Add AWS Service Connection
- Go to Webhook Relay Service Connections
- Click Add Connection
- Select AWS
- Enter your IAM user credentials:
- Access Key ID
- Secret Access Key
- Name it
aws-guarddutyand save
Step 2: Add GCP Service Connection
- Click Add Connection
- Select GCP
- Paste the contents of your service account JSON key
- Name it
gcp-storageand save
Step 3: Create a Bucket with SQS Input and GCS Output
- Go to Buckets and create a new bucket
- Name it
guardduty-archive
Add the SQS Input:
- Click Add Input → AWS SQS
- Select your
aws-guarddutyconnection - Enter the queue URL:
https://sqs.us-east-1.amazonaws.com/123456789012/guardduty-findings
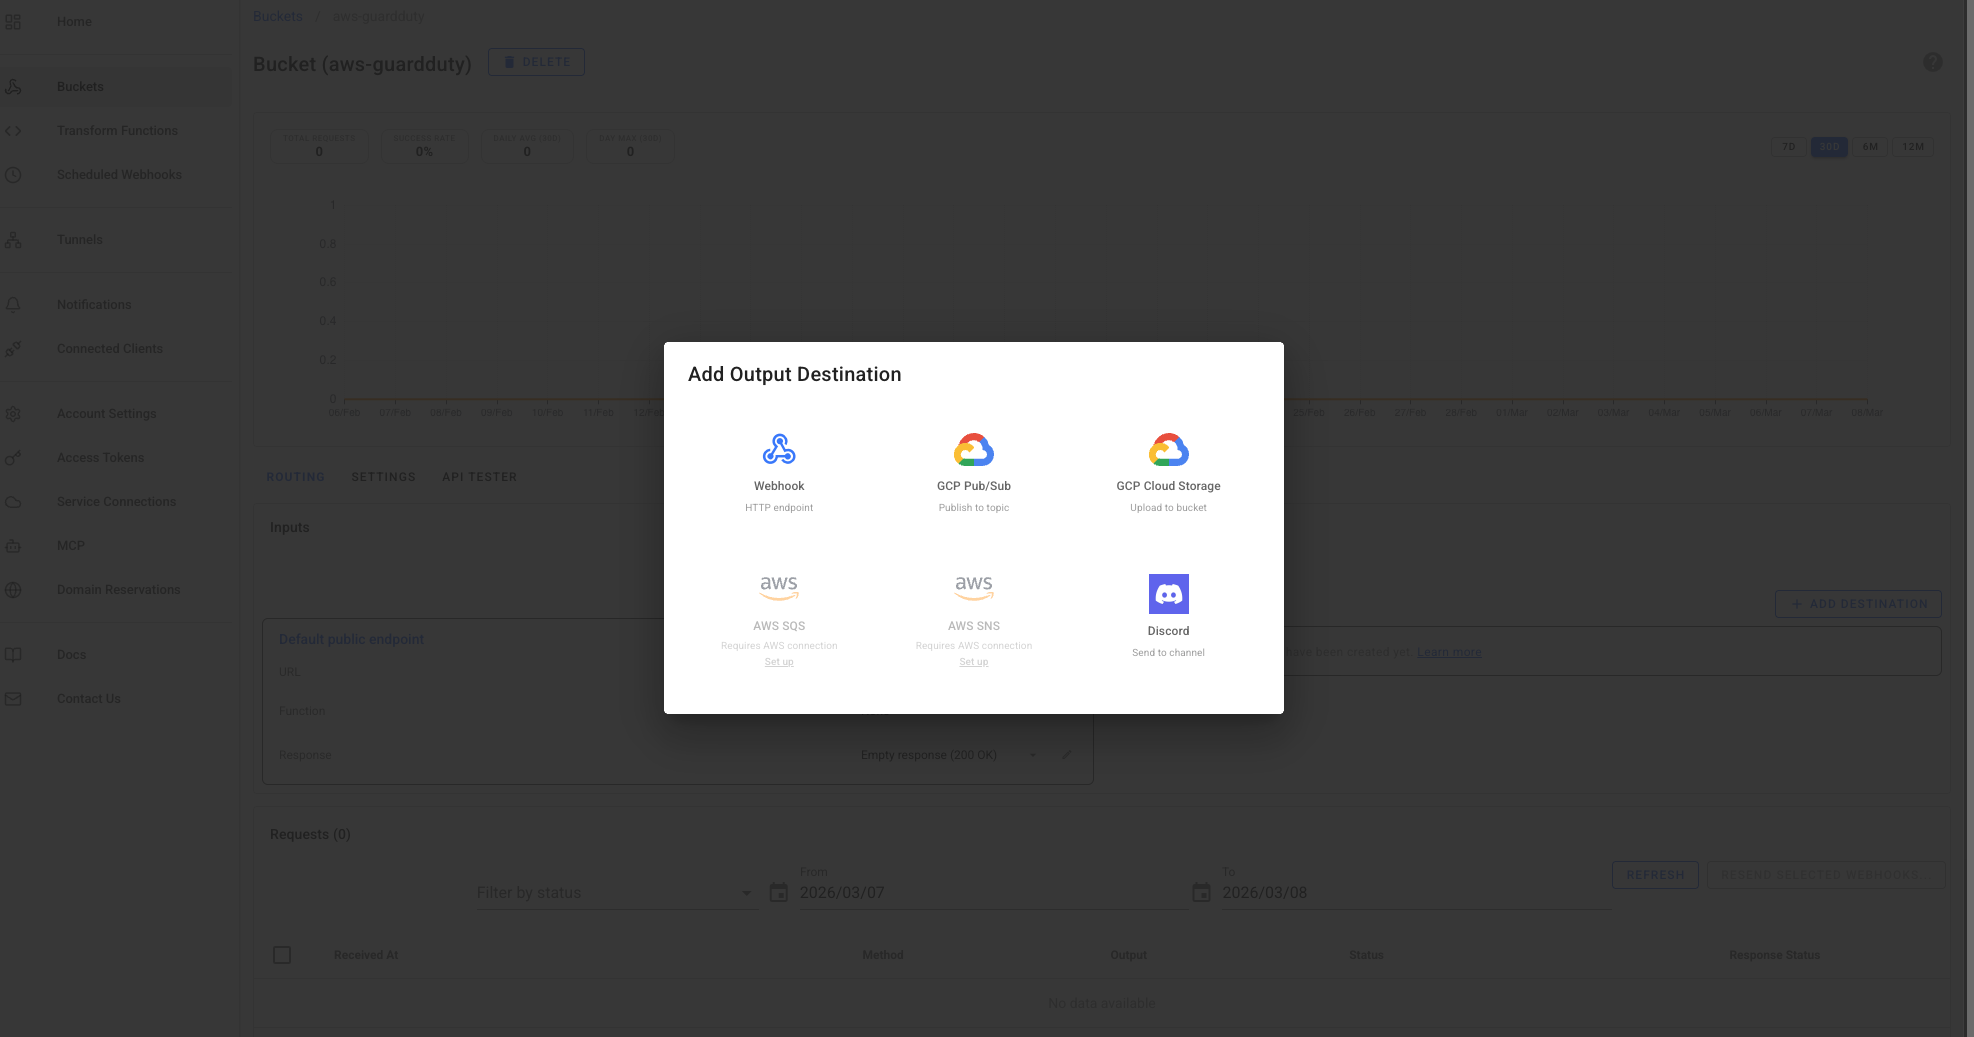
Add the GCS Output:
- Click Add Output → GCP Cloud Storage
- Select your
gcp-storageconnection - Bucket name:
guardduty-archive - Prefix:
findings/
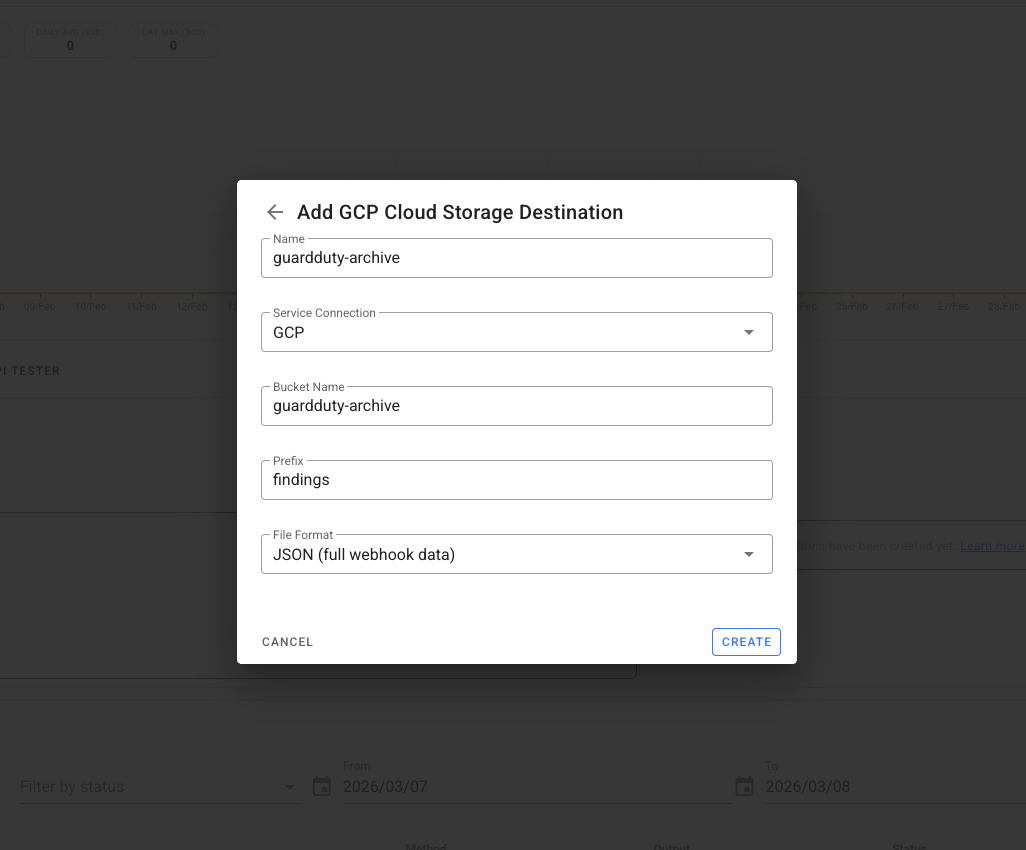
And then configure the bucket:
Webhook Relay will now poll your SQS queue and store each GuardDuty finding in GCS.
Verify It Works
Generate a Test Finding
GuardDuty can generate sample findings for testing:
- Go to AWS Console → GuardDuty → Settings
- Click Generate sample findings
This creates test findings that flow through your pipeline.
Check GCS
After a minute or two, check your GCS bucket. You should see files at:
findings/2026/03/06/<finding-id>.json
Each file contains the full GuardDuty finding with all metadata, severity scores, and resource details.
Optional: Transform Findings Before Storage
To reshape the data or extract specific fields before storing, add a Function to your bucket:
const event = JSON.parse(r.body)
const finding = event.detail

// Create a simplified structure for analysis
const archived = {
  id: finding.id,
  severity: finding.severity,
  type: finding.type,
  title: finding.title,
  description: finding.description,
  region: finding.region,
  accountId: finding.accountId,
  resourceType: finding.resource.resourceType,
  createdAt: finding.createdAt,
  updatedAt: finding.updatedAt,
  // Add custom fields
  archived_at: new Date().toISOString(),
  source: "aws-guardduty"
}

r.setBody(JSON.stringify(archived))
This extracts key fields and adds metadata, making BigQuery queries simpler.
Query Findings with BigQuery
Once your findings are in GCS, BigQuery can query them directly:
-- Create an external table pointing to your GCS bucket
CREATE EXTERNAL TABLE `project.dataset.guardduty_findings`
OPTIONS (
  format = 'JSON',
  uris = ['gs://guardduty-archive/findings/*']
);

-- Query high-severity findings from the last 7 days
SELECT
  id,
  type,
  severity,
  title,
  createdAt
FROM `project.dataset.guardduty_findings`
WHERE severity >= 7
  AND DATE(createdAt) >= DATE_SUB(CURRENT_DATE(), INTERVAL 7 DAY)
ORDER BY severity DESC;
Use Cases
Compliance and audit trails. Many compliance frameworks require long-term retention of security events. GCS lifecycle policies can automatically transition old findings to Archive storage.
Cross-cloud SIEM. If you're using Google Chronicle or another GCP-based SIEM, this pipeline feeds findings directly into your security analytics platform.
Cost optimization. AWS GuardDuty retains findings for 90 days. For longer retention, exporting to GCS with lifecycle policies is often cheaper than other archival solutions.
Multi-cloud correlation. Combine GuardDuty findings with security events from GCP and Azure in a single BigQuery dataset for unified threat analysis.
Conclusion
Routing GuardDuty findings to GCS used to require custom Lambda functions, cross-cloud IAM roles, and ongoing maintenance. With Webhook Relay Service Connections, setup takes minutes:
- Create an SQS queue and EventBridge rule in AWS
- Create a GCS bucket and service account in GCP
- Connect them through Webhook Relay with an SQS input and GCS output
Your findings are now archived in GCS, ready for BigQuery analysis, Chronicle ingestion, or compliance retention.
Sign up for Webhook Relay to start archiving GuardDuty findings.