
Custom webhook domains
Receive, process and forward webhooks using your own domain name.
Setting up custom domain
In many cases you would prefer to use your own domain when receiving the webhooks. It helps with branding and makes it easier to manage your webhooks. You can delete, transfer between buckets or update your domain at any time.
Step 1: Add your domain in Webhook Relay
First, navigate to Webhook Relay domains page and click on "Reserve domain" button.
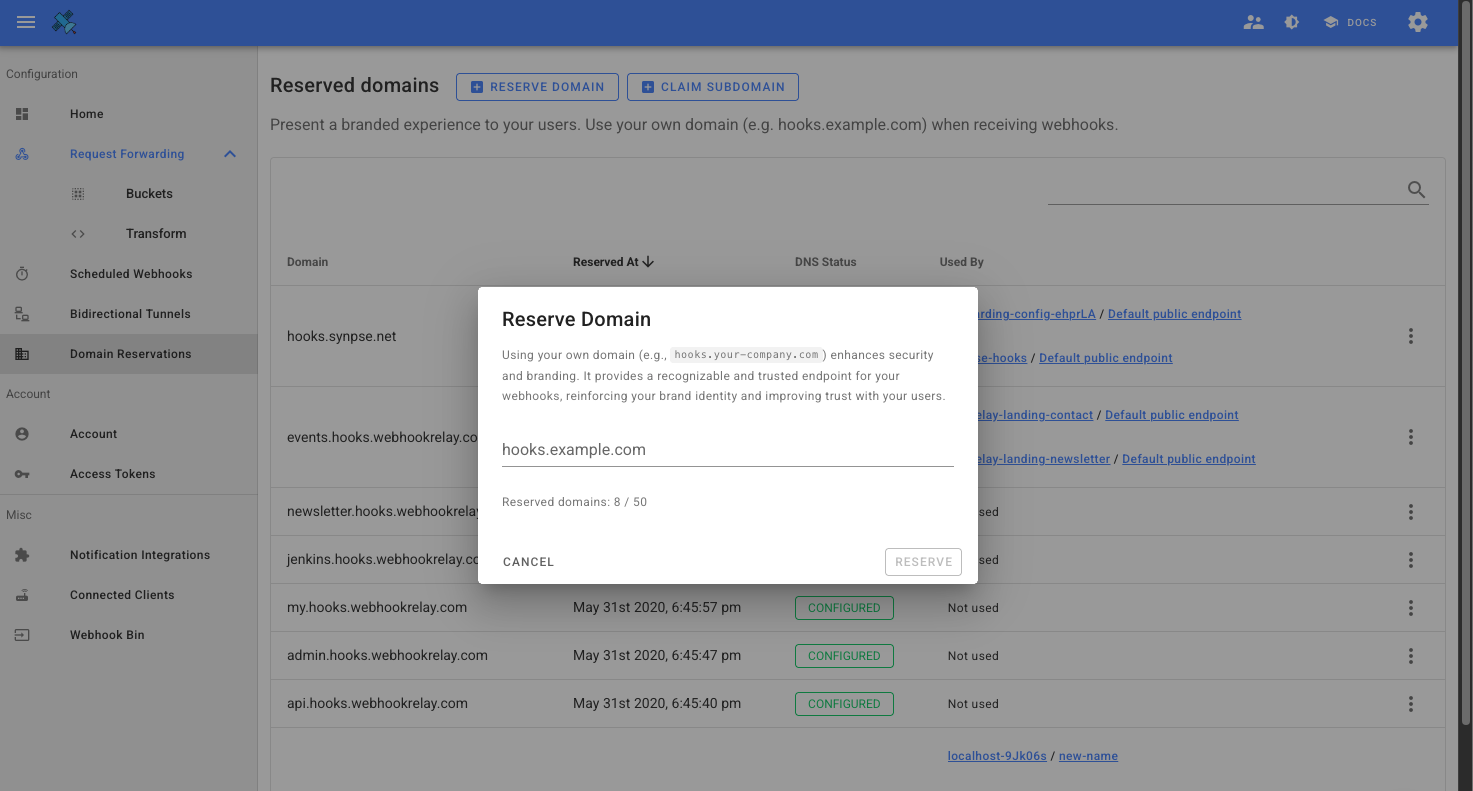
In the form add your domain name and click on "Reserve" button.
Step 2: Configure your DNS
Once the domain is added, you should see "Pending Action" badge next to your reserved domain:
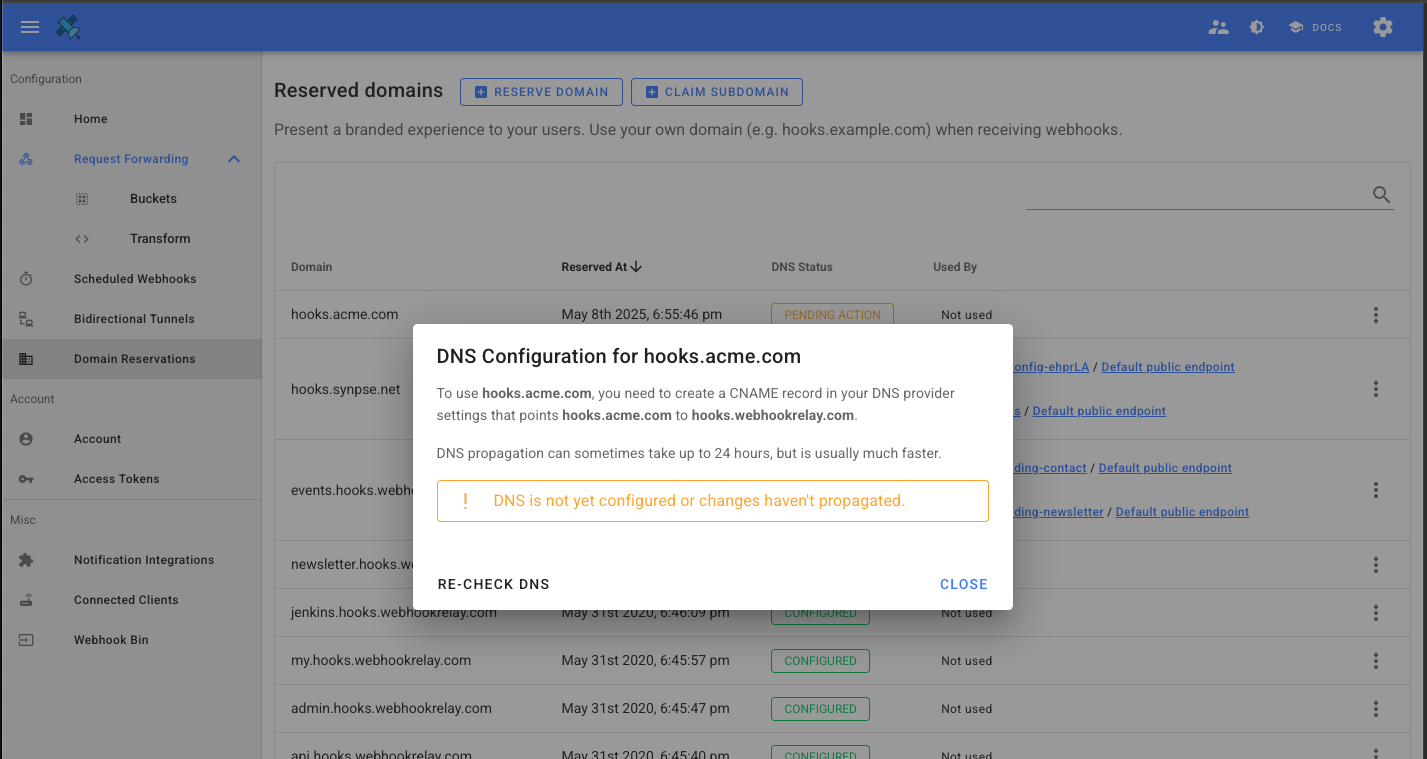
You will need to access your DNS provider. Then, create a CNAME record in your domain pointing at hooks.webhookrelay.com. Instructions on how to do this can be found in your DNS provider's documentation.
How to do it in:
- Cloudflare: https://developers.cloudflare.com/dns/zone-setups/partial-setup/setup/
- Namecheap: https://www.namecheap.com/support/knowledgebase/article.aspx/9646/2237/how-to-create-a-cname-record-for-your-domain/
- Gandi: https://docs.gandi.net/en/domain_names/common_operations/link_domain_to_website.html
Step 3: Select your domain in the Webhook Relay bucket
Last step is to select your domain in the Webhook Relay bucket's input settings:
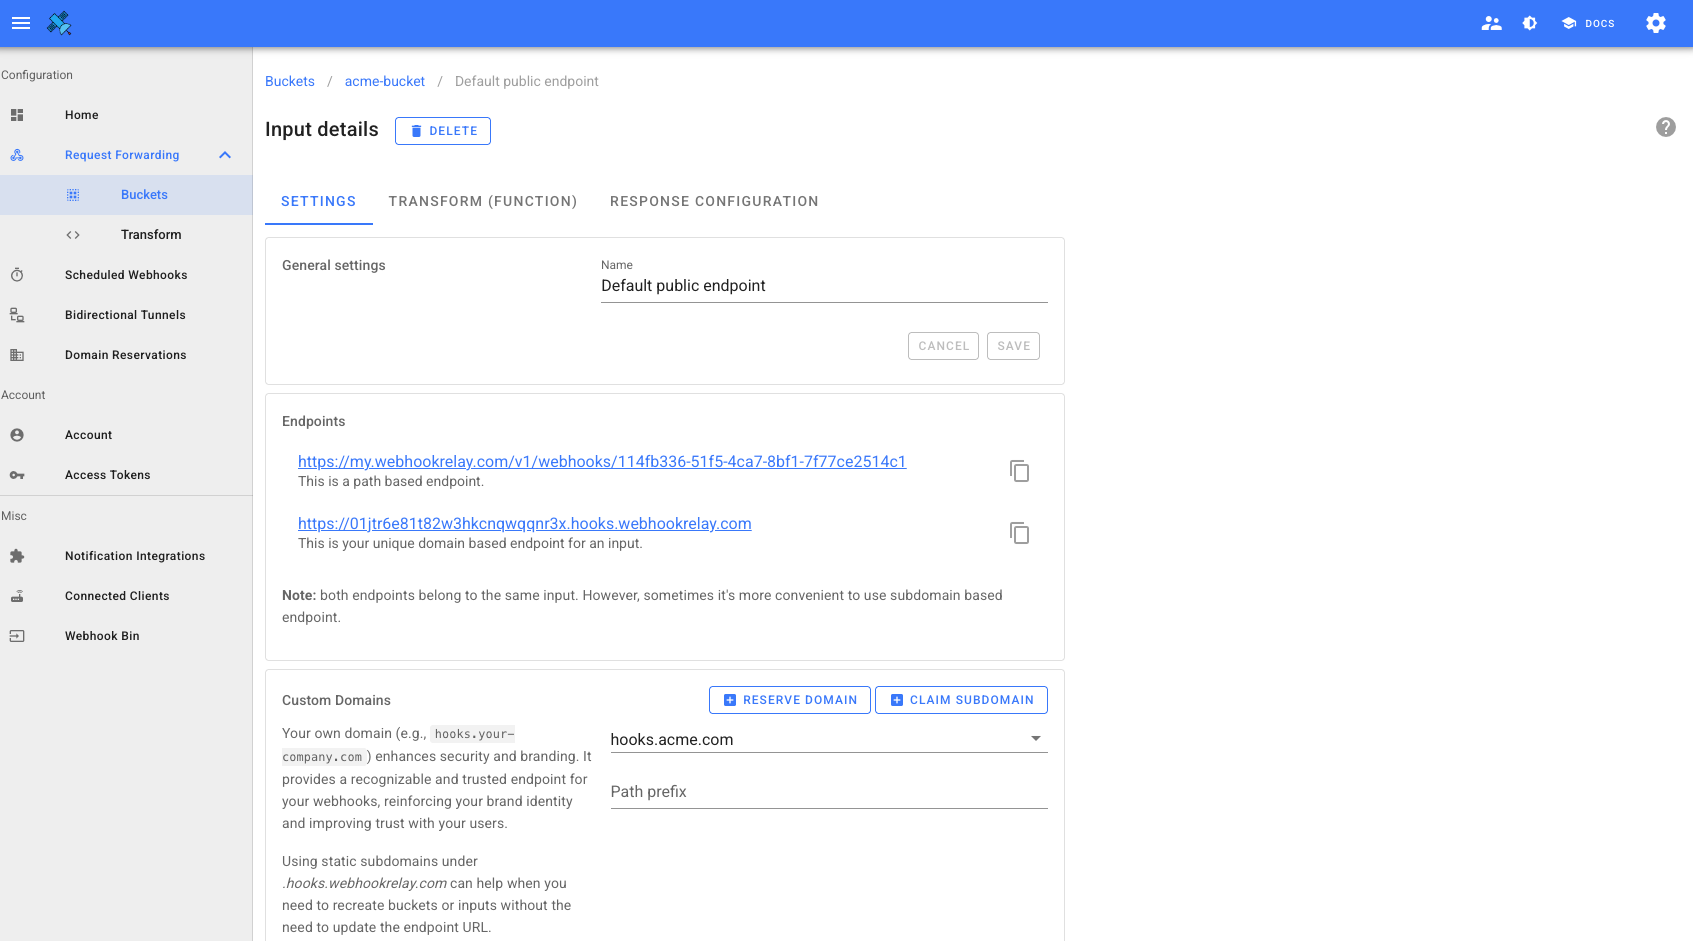
Path is optional but it allows you to reuse same domain for multiple buckets and inputs by using different paths.