
Jenkins and Bitbucket
A quick guide on Jenkins Bitbucket webhooks integration without public IP/NAT or behind a firewall
How to Configure Bitbucket Webhooks with Jenkins
To configure Bitbucket webhooks with Jenkins, install the Jenkins Bitbucket plugin, set up webhook forwarding using Webhook Relay to handle the connection if Jenkins is behind a firewall, configure the webhook in your Bitbucket repository settings, and enable the build trigger in your Jenkins job. This allows automated builds whenever code is pushed to Bitbucket.
In this tutorial, we will show a Jenkins Bitbucket integration using webhooks. It will work behind a firewall, inside a private network. You can use this setup for other services too - such as GitHub, GitLab or anything else that emits webhooks.
Main advantages of Webhook Relay here are:
- No delay between polling requests
- Bitbucket webhooks are well-documented and easy to configure with Jenkins plugin
- Additional security layer as Jenkins is not exposed to the internet as webhooks by default are uni-directional, responses are not returned to the caller.
Prerequisites
- Webhook Relay account, create one here.
- Jenkins instance. We will not go into installing Jenkins itself as there are quite a few options and many articles on that. See Jenkins official docs for up-to-date instructions.
- Bitbucket account and a repository that you will want to use.
Configure webhook forwarding
We will be using the Jenkins Bitbucket plugin. This plugin exposes a single endpoint to which we can send bitbucket webhooks from multiple repositories.
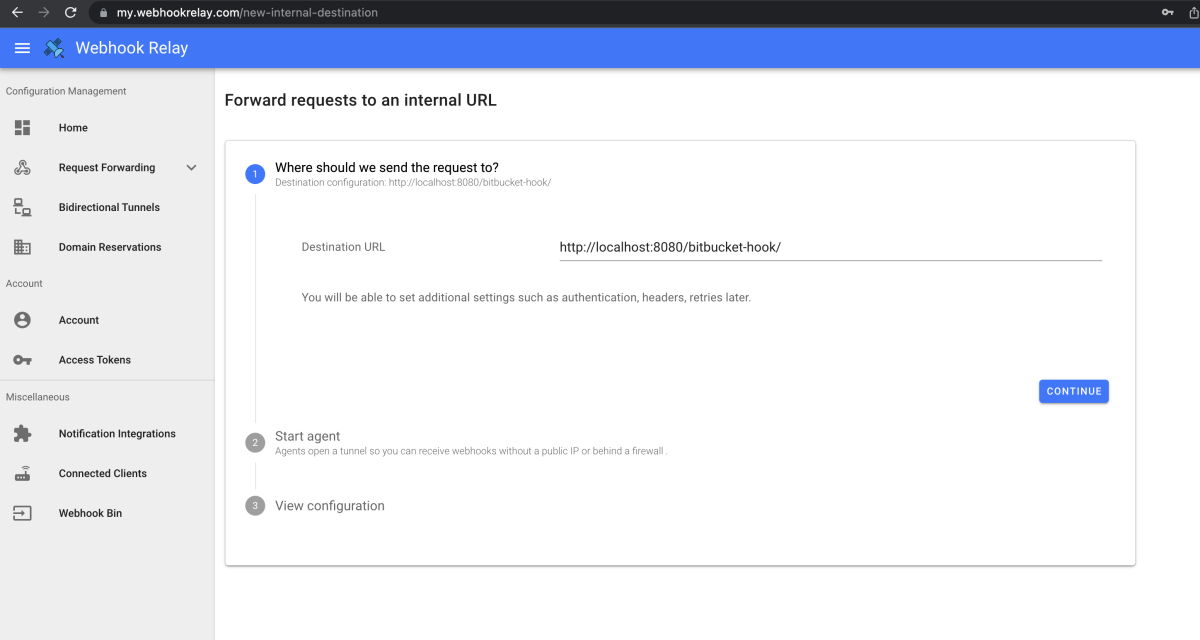
Go to the internal URL forwarding setup page https://my.webhookrelay.com/new-internal-destination and enter your Jenkins address. In my case I will be running the agent on the same machine as Jenkins so the address for me is http://localhost:8080/bitbucket-hook/:
Follow the instructions to setup the agent and being forwarding webhooks. You will get your public URL that you can use in Bitbucket webhook configuration.
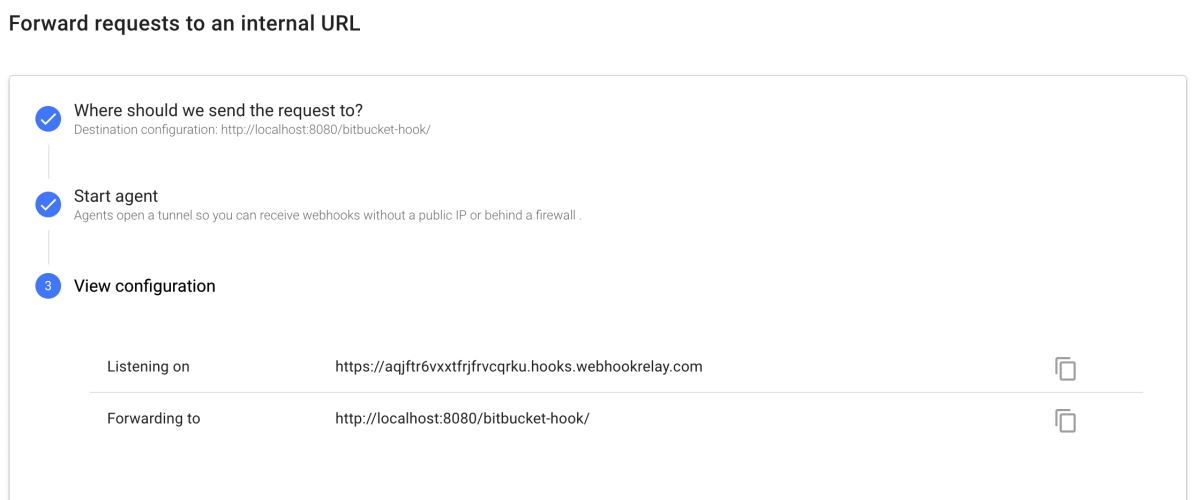
As you can see in the screenshot above, take the "Listening on" address.
Configure Bitbucket
For Bitbucket webhook configuration you can follow the plugin guide here: https://plugins.jenkins.io/bitbucket/#plugin-content-bitbucket-cloud-usage. You need to go to the repository settings and then to the webhooks section add "Add webhook" with the public URL that you have gotten from the previous step:
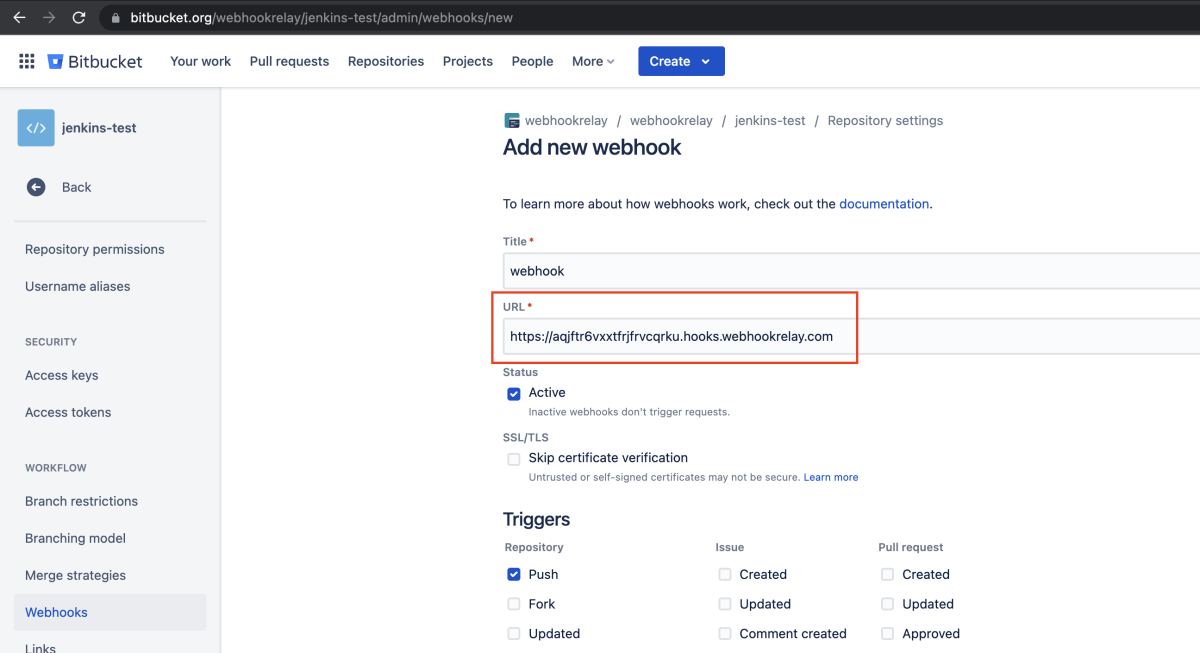
Bitbucket will be sending webhooks to Webhook Relay and our service will forwarding them to your internal Jenkins instance.
Configure Jenkins
Ensure you have the Bitbucket Jenkins plugin. Plugin instructions can be found here: https://plugins.jenkins.io/bitbucket/#plugin-content-bitbucket-cloud-usage.
In your repository configure the build trigger:
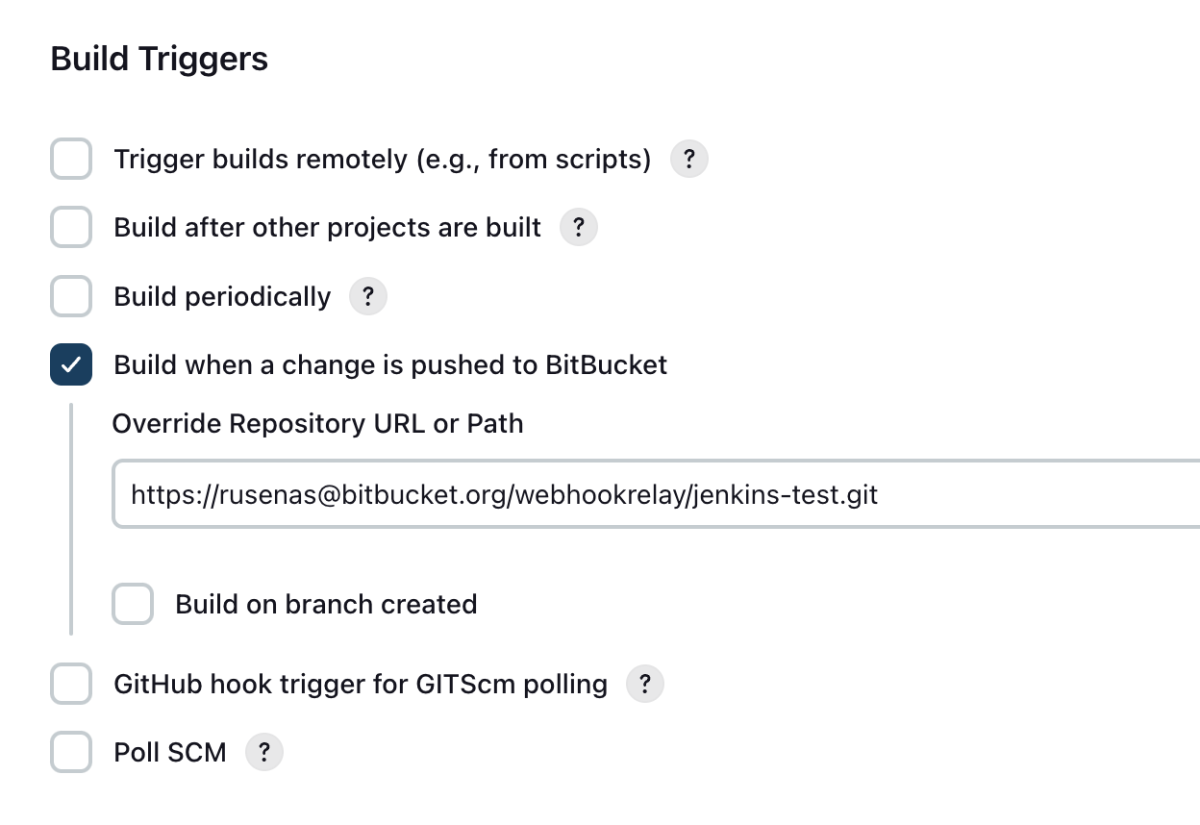
Complete Step-by-Step Integration Guide
Follow these steps to integrate Bitbucket webhooks with Jenkins:
- Install Jenkins Bitbucket Plugin - Navigate to Jenkins plugin manager and install the "Bitbucket" plugin
- Create Webhook Relay Account - Sign up at Webhook Relay and create authentication tokens
- Set Up Internal Forwarding - Configure Webhook Relay to forward to your Jenkins endpoint at
http://localhost:8080/bitbucket-hook/ - Start Relay Agent - Run the relay agent using your authentication credentials to begin forwarding
- Get Public URL - Copy the public webhook URL provided by Webhook Relay
- Configure Bitbucket Webhook - In your Bitbucket repository settings, add a new webhook with the public URL
- Configure Jenkins Job - Enable "Build when a change is pushed to Bitbucket" trigger in your Jenkins job
- Test Integration - Push a commit to Bitbucket and verify Jenkins triggers the build automatically
Configuration Code Example
Start the Webhook Relay agent:
relay login -k your-token-key -s your-token-secret
relay forward -b your-bucket-name http://localhost:8080/bitbucket-hook/
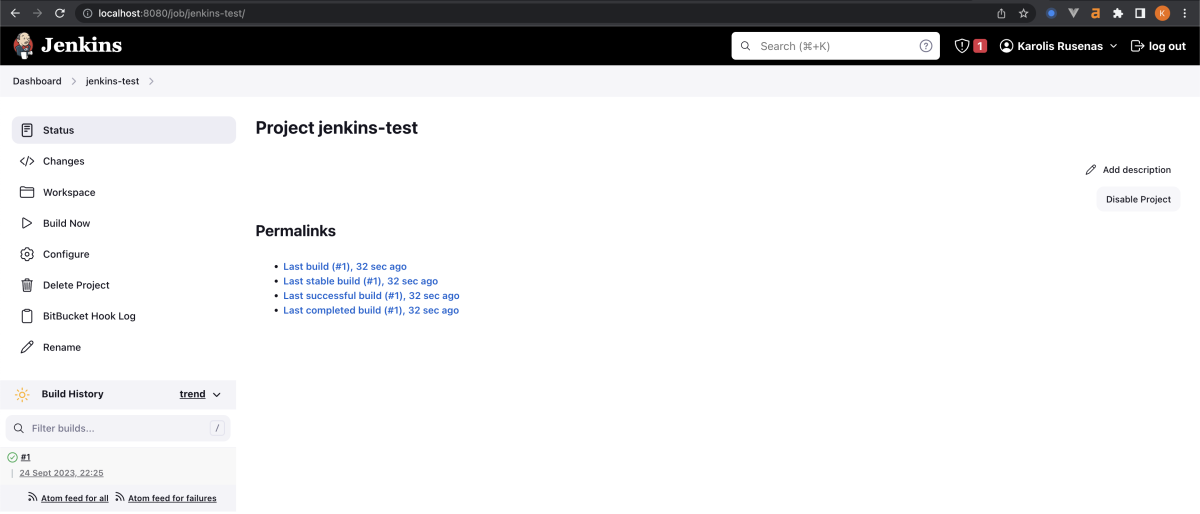
Testing
Once the agent is running, you can test by pushing a commit to your repository. You should see a build being triggered in Jenkins:
You should also see it in the terminal where you started Webhook Relay agent:
relay forward -b localhost-9Jk06s
Filtering on bucket: localhost-9Jk06s
Starting webhook relay agent...
2023-09-24 23:03:10.884 INFO    using standard transport...
2023-09-24 23:03:10.951 INFO    webhook relay ready...  {"host": "my.webhookrelay.com:8080", "buckets": ["localhost-9Jk06s"]}
Troubleshooting
There are several places to look for logs:
- Webhook Relay bucket details. It will show all your webhooks and their requests, responses.
- Jenkins system logs. You can find them in the Jenkins UI under "Manage Jenkins" -> "System Log".
- Every time you commit to your repository, you should see Bitbucket webhooks in Webhook Relay bucket logs.
Frequently Asked Questions
Why is Jenkins not triggering builds when I push to Bitbucket?
Check that you have enabled the "Build when a change is pushed to Bitbucket" trigger in your Jenkins job configuration. Also verify that the Webhook Relay agent is running and that Bitbucket webhooks are being received (check Webhook Relay logs).
Response "200" in Webhook Relay logs but no build
It's possible that you don't have the SCM configuration matching your Bitbucket repository. Check the system logs in Jenkins for errors such as:
PM WARNING com.cloudbees.jenkins.plugins.BitbucketJobProbe triggerMatchingJobs
No SCM configuration was found!
If you find them, add your repository to the SCM configuration in the Jenkins job.
On Webhook Relay all logs appear as "received"
You need to start the agent, follow the instructions here. Agent is required to run in order to receive and forward webhooks.
How do I secure my Bitbucket webhook integration?
Webhook Relay adds security by keeping Jenkins behind a firewall. Webhooks are uni-directional, so responses aren't returned to the caller. For additional security, you can use token-based authentication in Webhook Relay.
Can I use this setup with Bitbucket Server?
Yes! Bitbucket server webhook to jenkins example can be found here https://plugins.jenkins.io/bitbucket/#plugin-content-bitbucket-server-usage. You mostly need to install a webhook plugin https://marketplace.atlassian.com/apps/1215474/post-webhooks-for-bitbucket?hosting=server&tab=overview and then create a Post-WebHook, which is different from WebHook and enable on push.
What if my Jenkins is running on a different port?
Simply adjust the forwarding URL when setting up Webhook Relay. For example, if Jenkins is on port 9090, use http://localhost:9090/bitbucket-hook/ instead of port 8080.