
CLI
Learn how to install relay CLI on MacOS, Linux and Windows to start forwarding webhooks to your internal services and open tunnels to expose your services
Download
Webhook Relay provides an official command client for quick configuration of webhook forwarding, tunnels and can also provision authentication tokens. It provides batteries-included agent for developing and testing workflows. It takes only a few seconds for it to start running with one-way HTTP request forwarding, bidirectional tunnels, and CLI for managing your resources.
Linux and MacOS users
curl https://my.webhookrelay.com/webhookrelay/downloads/install-cli.sh | bash
Windows
iwr https://my.webhookrelay.com/webhookrelay/downloads/install-cli.ps1 -useb | iex
FreeBSD
Download the binary:
# For amd64
sudo fetch -o /usr/local/bin/relay https://storage.cloud.google.com/webhookrelay/downloads/relay-freebsd-amd64

# For i386
sudo fetch -o /usr/local/bin/relay https://storage.cloud.google.com/webhookrelay/downloads/relay-freebsd-386
Give it permissions to execute and update itself:
sudo chmod +wx /usr/local/bin/relay
Authentication
First, open the dashboard https://my.webhookrelay.com/ and either register or login.
Then, go to the https://my.webhookrelay.com/tokens page and click on "create token" and follow the instructions:
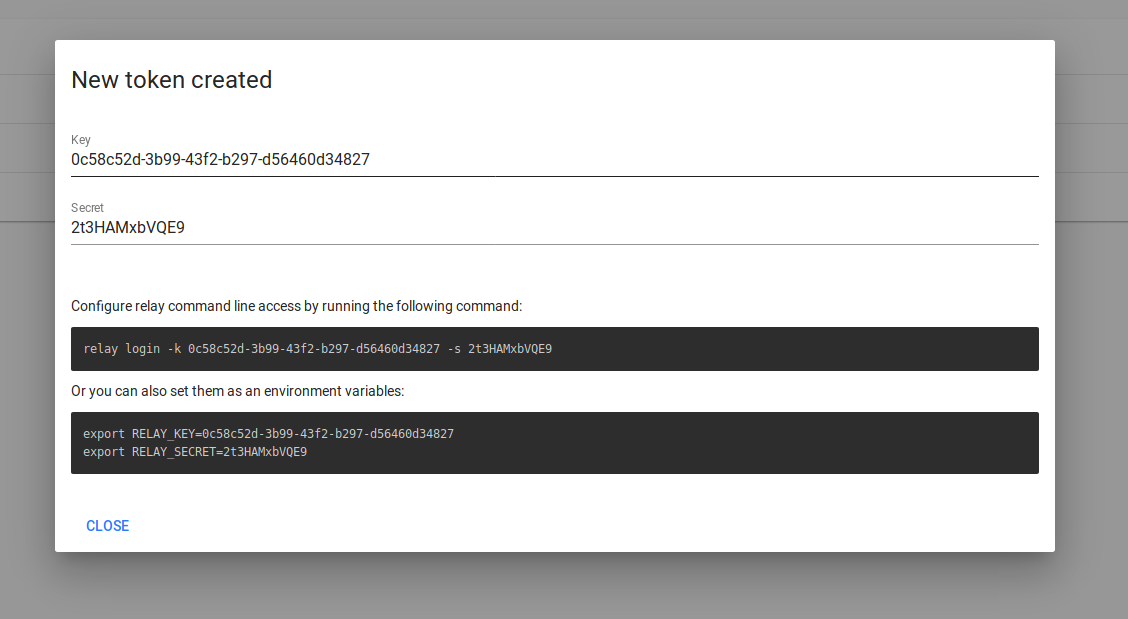
Once created, you can test it by running
relay bucket ls
Which should return a list of your buckets.
Download binaries directly
If you wish to skip using our installation script, you can find individual executables here:
# Linux x86-64 (64-bit)
https://storage.googleapis.com/webhookrelay/downloads/relay-linux-amd64

# Linux x86 (32-bit)
https://storage.googleapis.com/webhookrelay/downloads/relay-linux-386

# Linux aarch (64-bit)
https://storage.googleapis.com/webhookrelay/downloads/relay-linux-aarch64

# Linux arm (32-bit)
https://storage.googleapis.com/webhookrelay/downloads/relay-linux-arm

# Windows (64-bit)
https://storage.googleapis.com/webhookrelay/downloads/relay-windows-amd64.exe

# Windows (32-bit)
https://storage.googleapis.com/webhookrelay/downloads/relay-windows-386.exe
Changelog
To view what has changed, please visit our changelog.