
Jenkins Plugin
Receive GitHub, GitLab and Bitbucket webhooks in Jenkins without a public IP using the native Webhook Relay plugin.
The Webhook Relay Jenkins plugin lets Jenkins receive webhooks from GitHub, GitLab and
Bitbucket without exposing Jenkins to the public internet — no public IP, no reverse
proxy, no inbound firewall rules. The plugin opens an outbound connection to a Webhook Relay
bucket and forwards each webhook it receives to the matching Jenkins endpoint
(/github-webhook/, /bitbucket-hook/, …), so your SCM can trigger builds even when Jenkins
runs on a private network, behind a NAT, or on your laptop.
Unlike running the relay CLI as a separate agent, the plugin runs inside Jenkins — there
is nothing else to install or keep alive. And because delivery goes through a bucket (the
forwarding feature, not a tunnel), every webhook is recorded on the bucket's logs page
together with the response Jenkins returned, which makes debugging deliveries trivial.
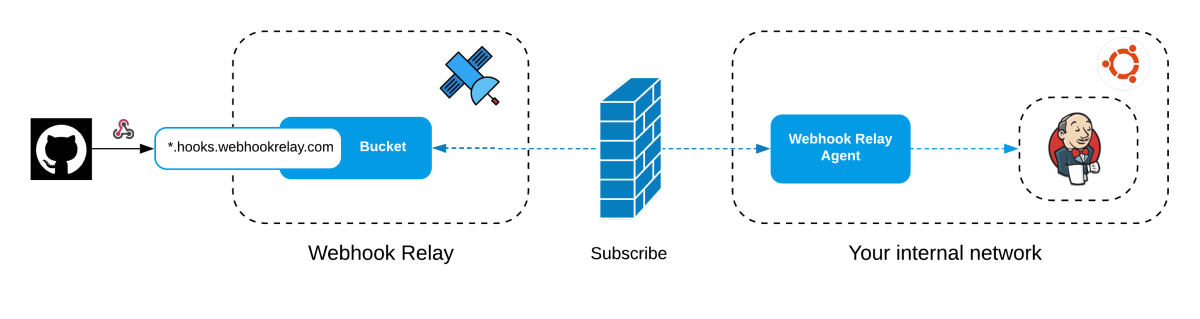
How it works
GitHub / GitLab / Bitbucket
        │  (webhook)
        ▼
https://<your-bucket>.hooks.webhookrelay.com      ← public URL you paste into the SCM
        │
        ▼
   Webhook Relay bucket  ──────────────►  logs page (every request + Jenkins response)
        │  (outbound WebSocket opened by the plugin)
        ▼
   Jenkins  →  /github-webhook/  →  build triggered
- The plugin authenticates with your API token and subscribes to a bucket over a persistent outbound WebSocket. No inbound ports are opened on Jenkins.
- A webhook hits the bucket's public input URL and Webhook Relay streams it down the socket.
- The plugin replays the request against the Jenkins endpoint for your SCM and reports the response back to the bucket log.
Requirements
- Jenkins 2.479.1 or newer (Java 17 or 21)
- A free Webhook Relay account and an API token
1. Install the plugin
From Manage Jenkins → Plugins → Available, search for Webhook Relay and install it.
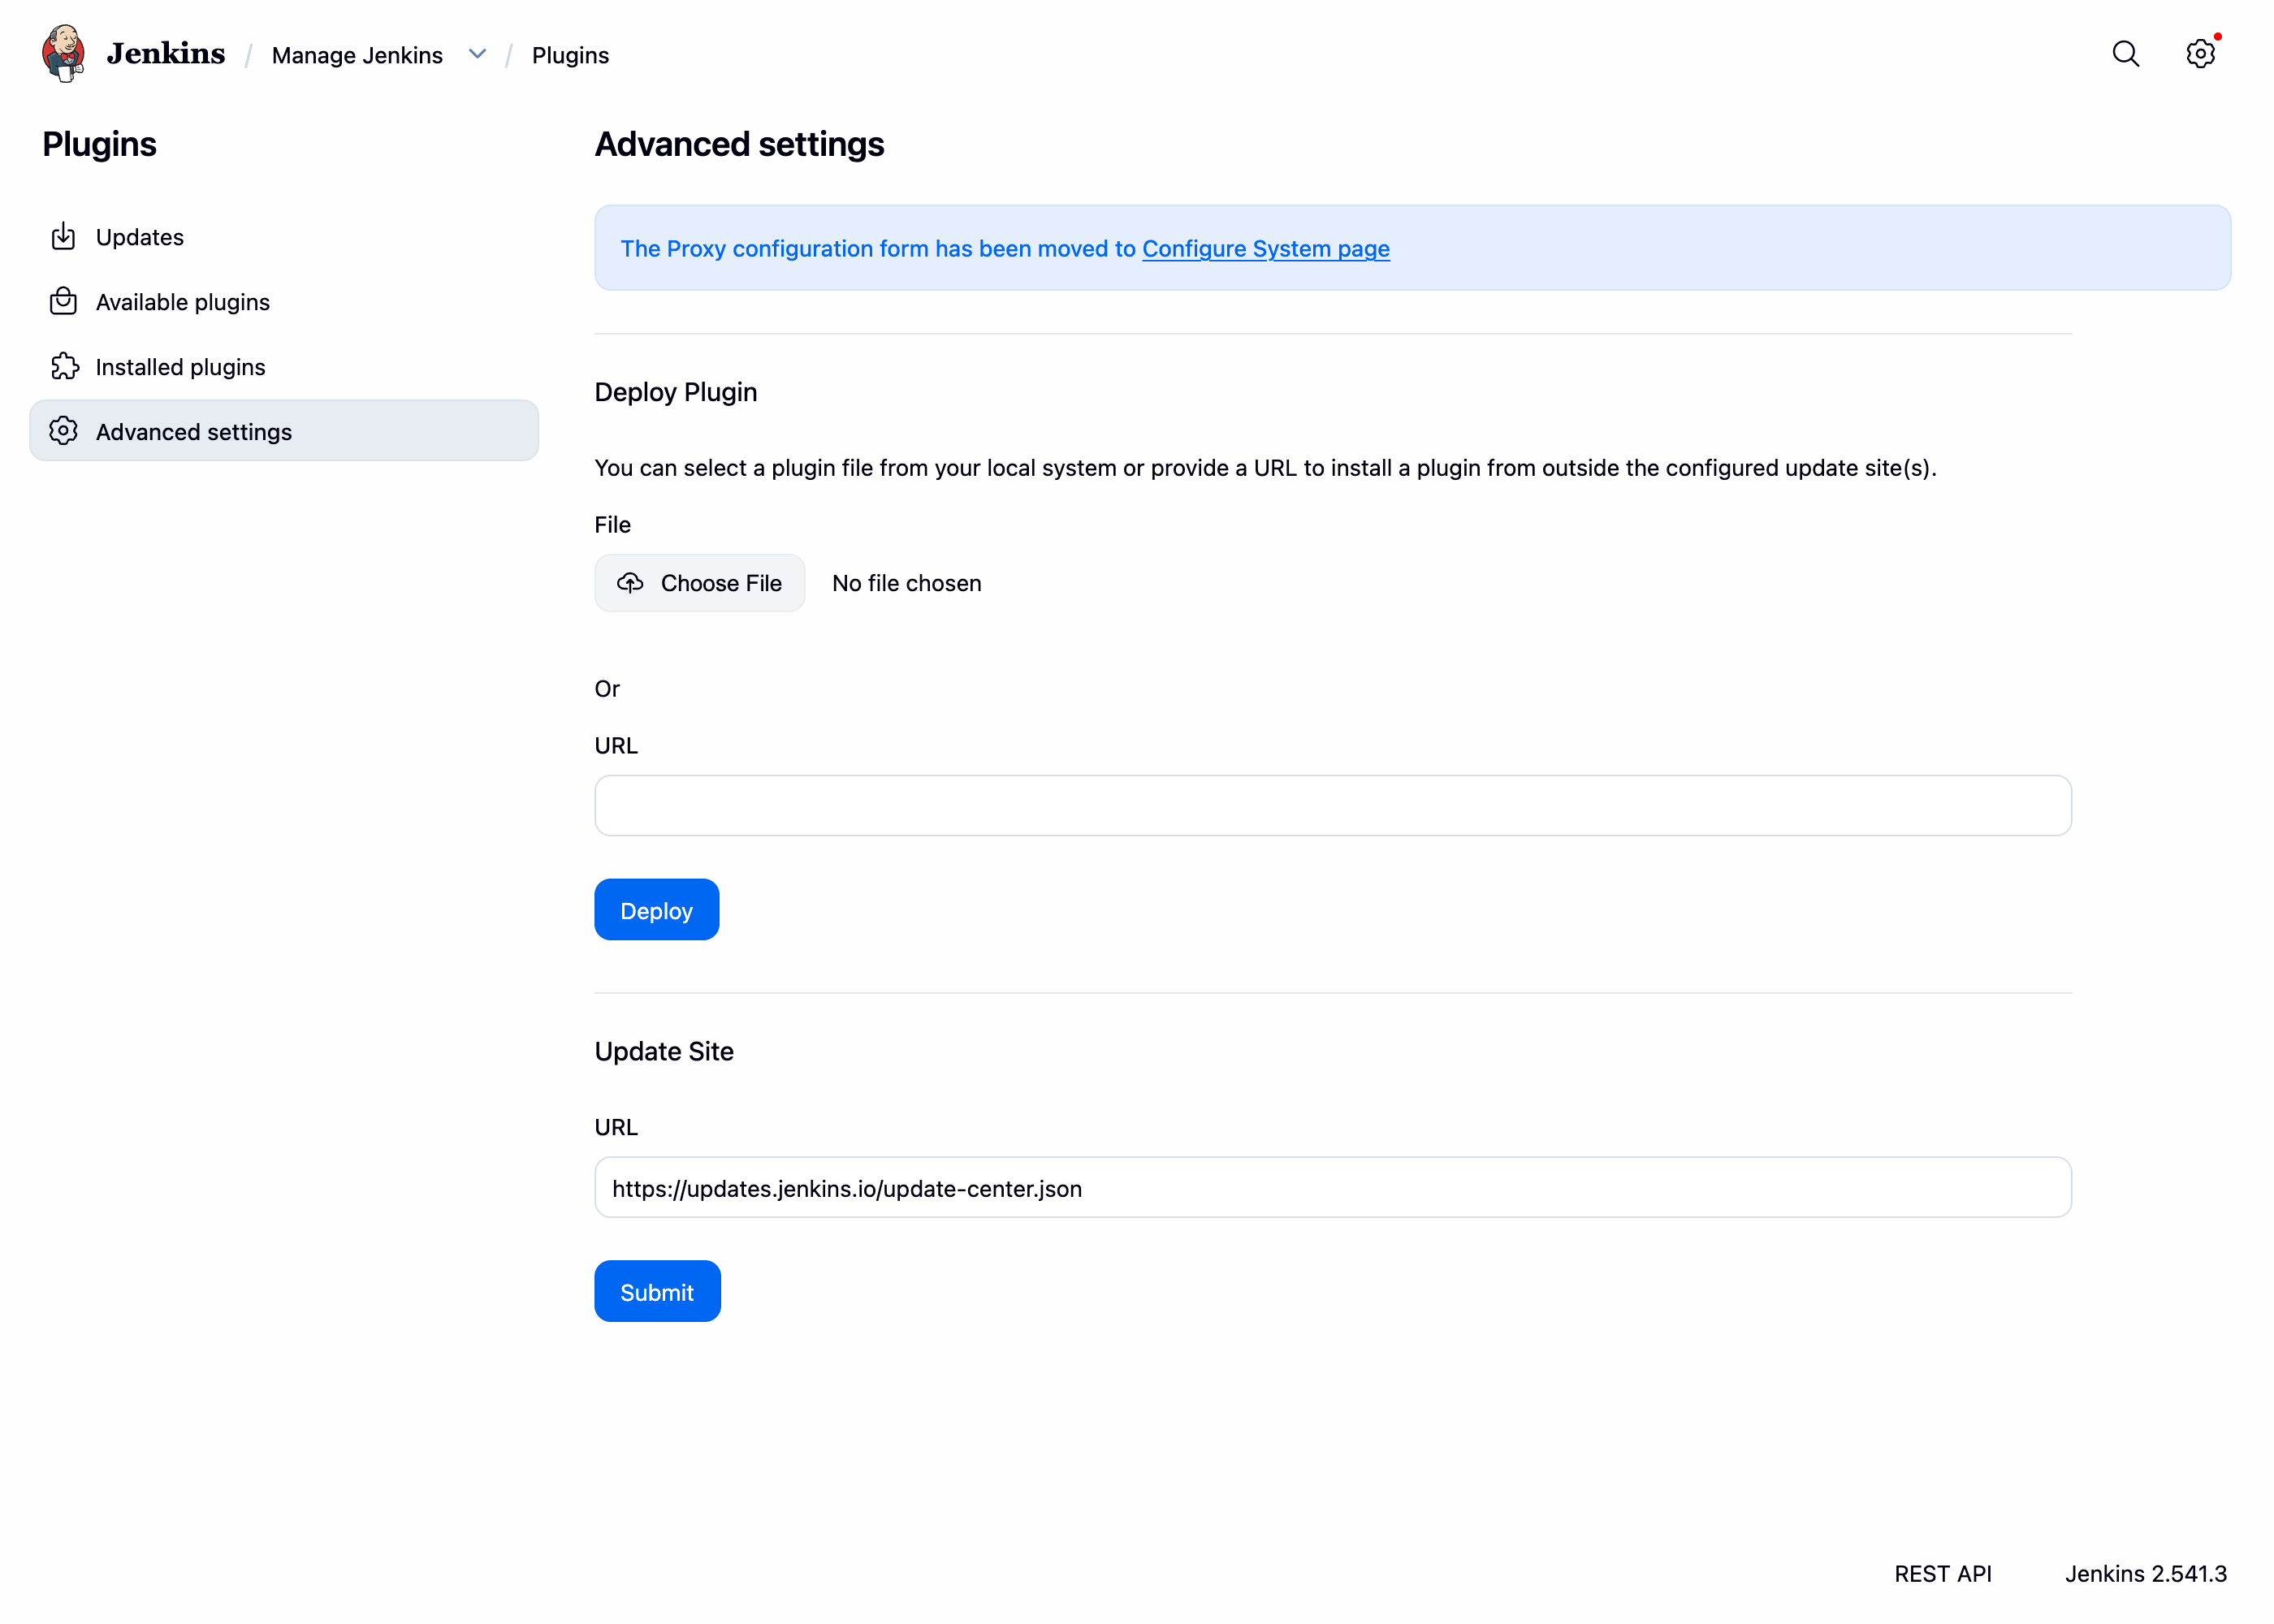
To install a downloaded build manually, go to Manage Jenkins → Plugins → Advanced settings
→ Deploy Plugin and upload the webhook-relay.hpi file:
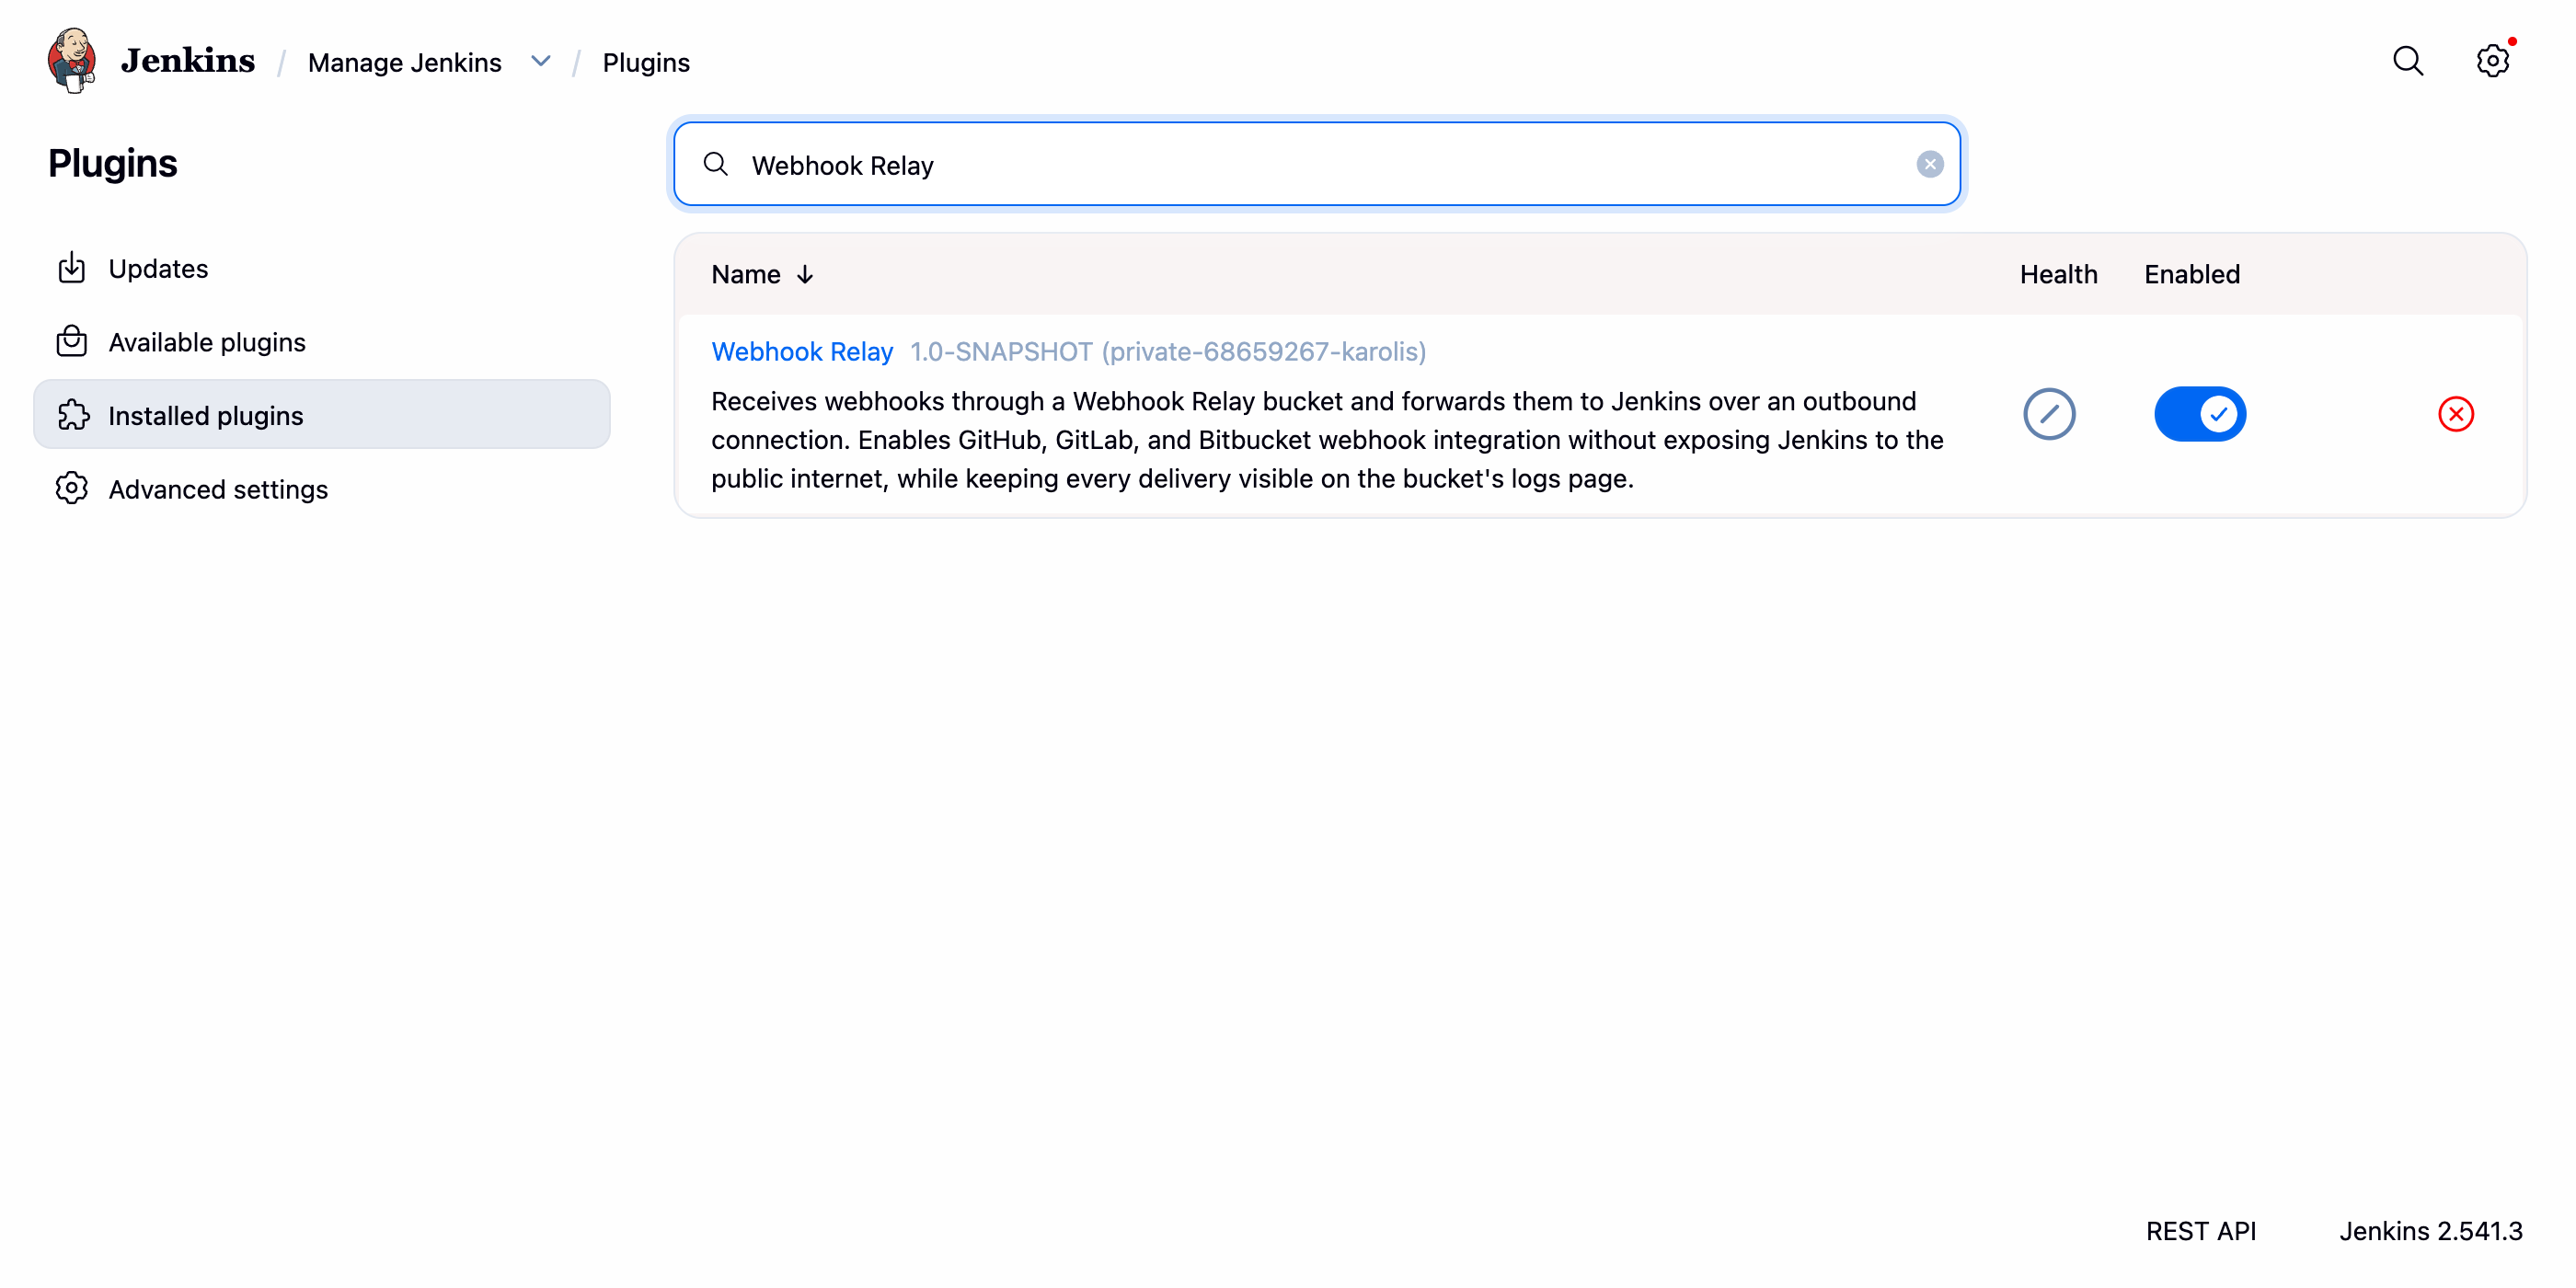
After restarting, the plugin shows up under Installed plugins:
2. Configure the connection
Open Manage Jenkins → System and scroll to the Webhook Relay section:
- Enter your API Key and API Secret from the tokens page.
- Enter a Bucket name (for example
jenkins-plugin). It can be an existing bucket or a new name — the plugin will create it for you. - Pick your SCM Webhook Preset (GitHub, GitLab, Bitbucket or Generic Webhook Trigger).
- Tick Enable and click Save.
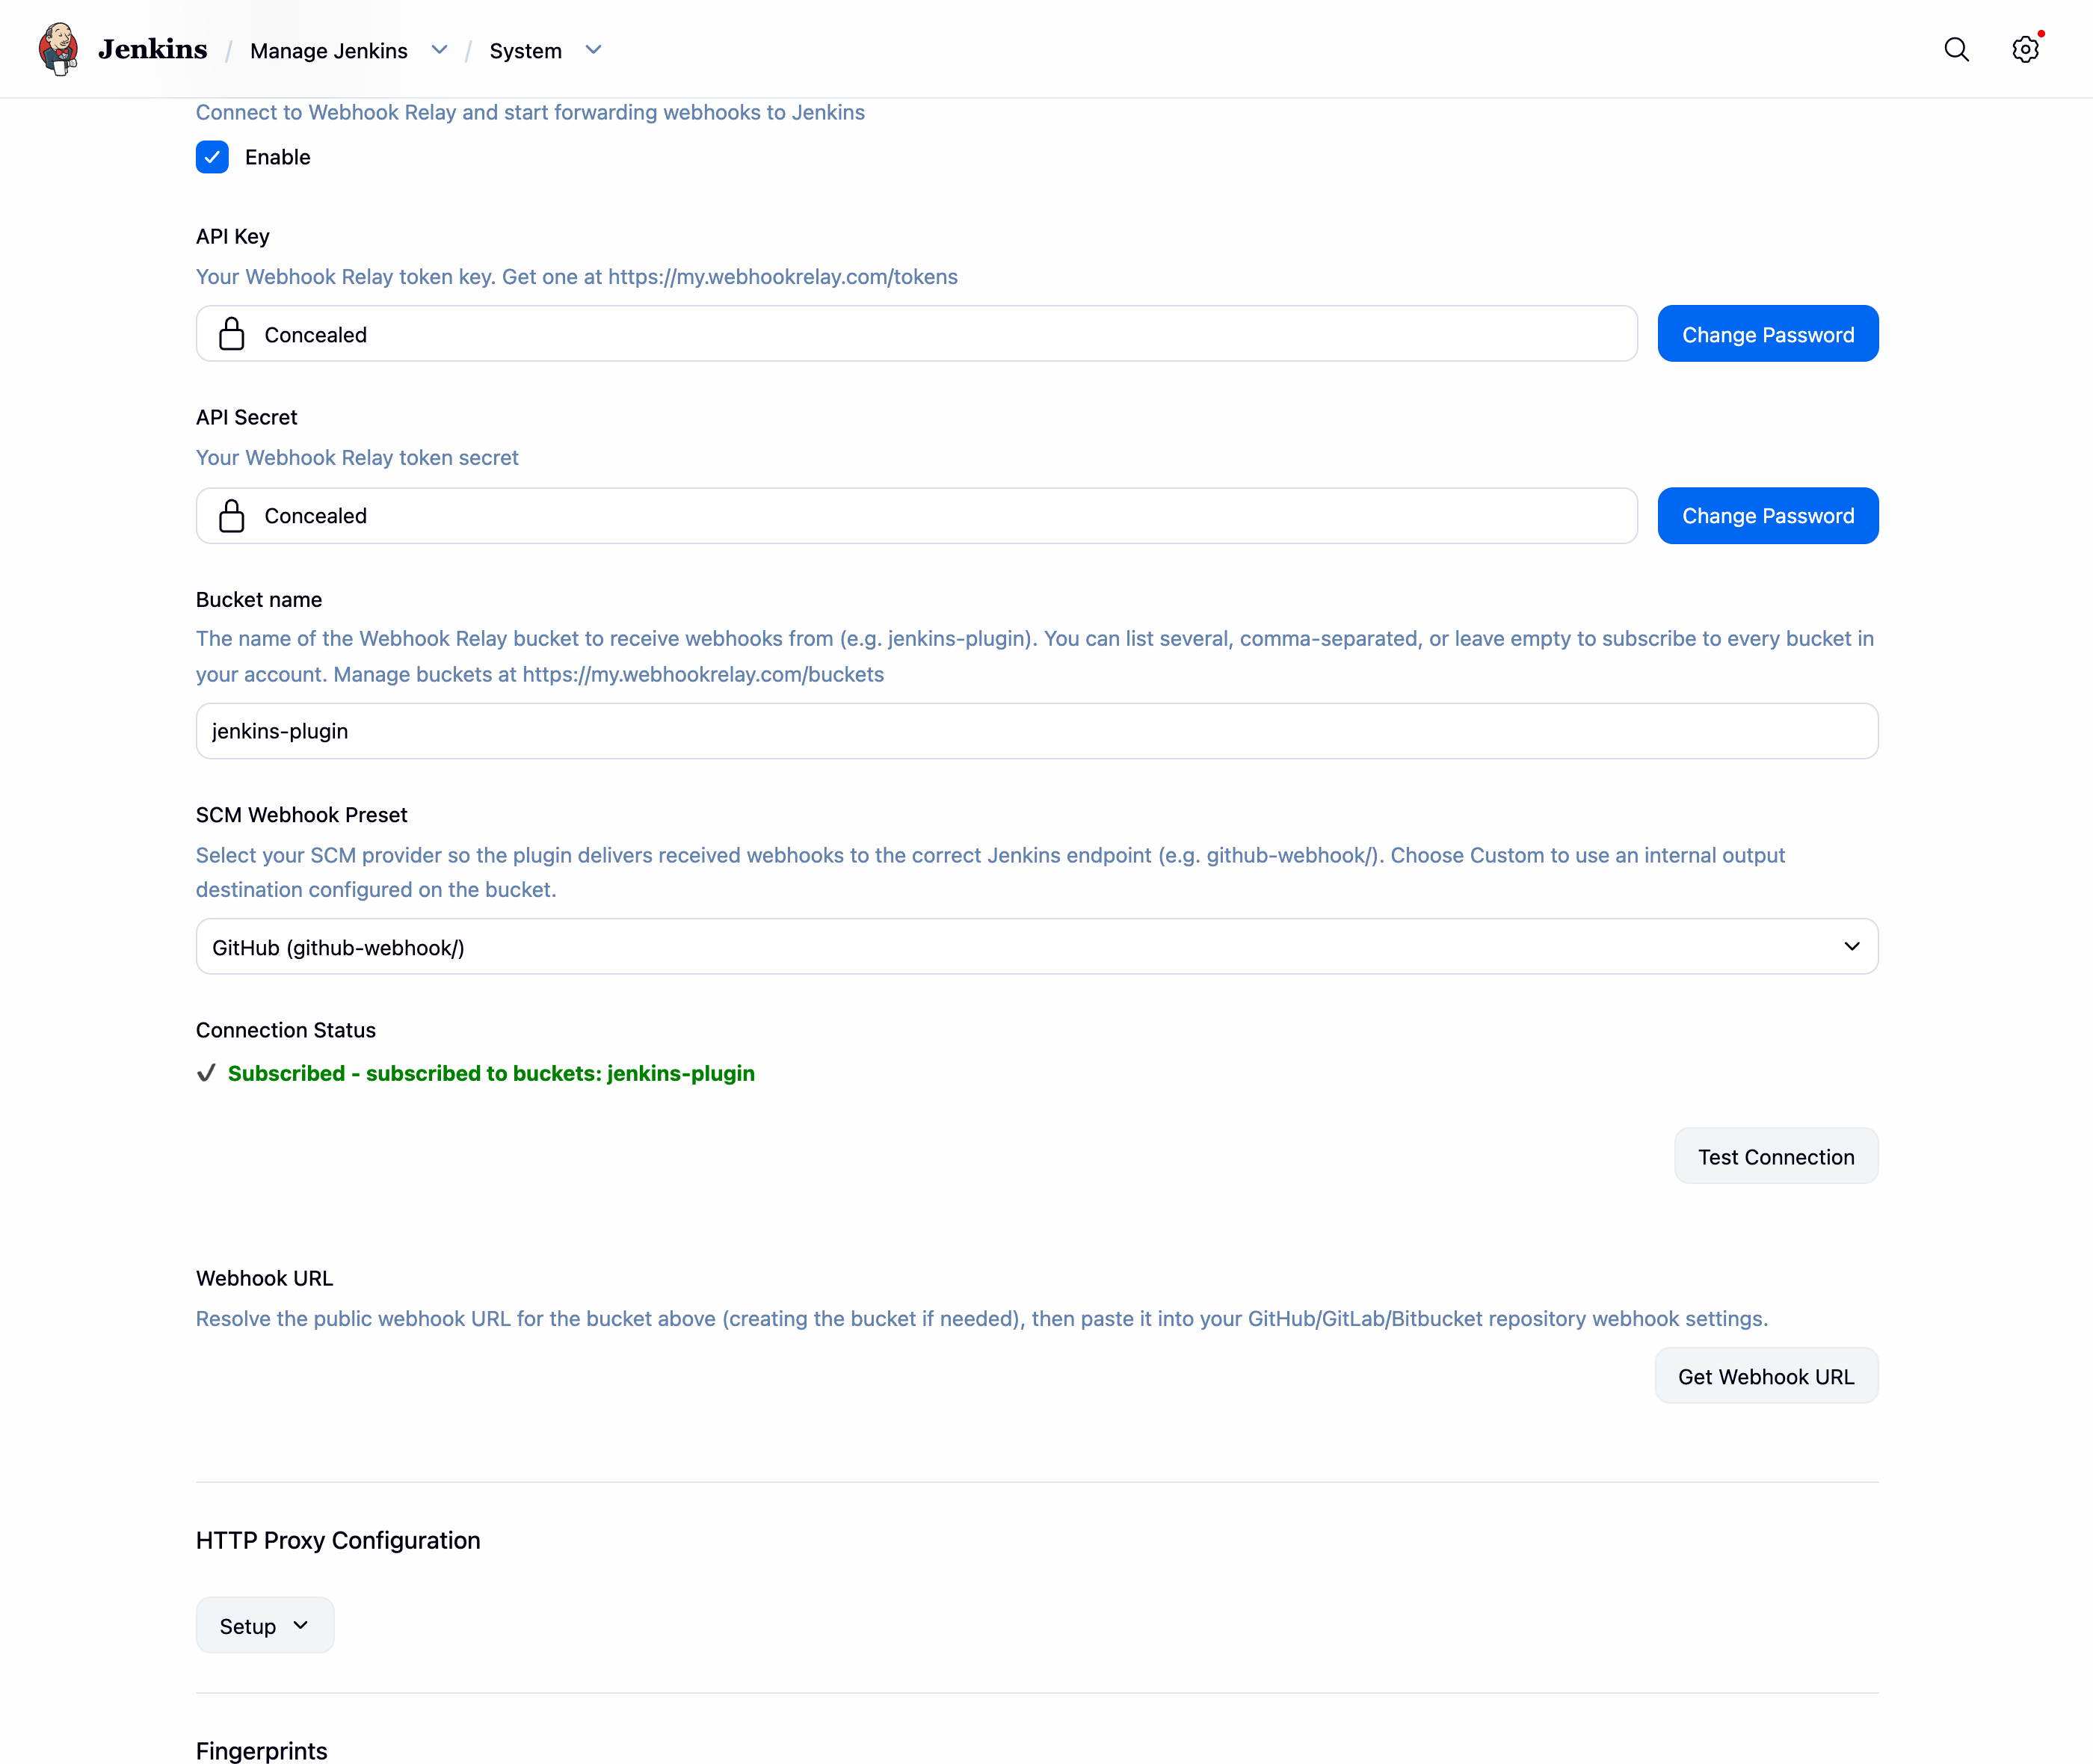
When connected, Connection Status reads ✔ Subscribed. Use Test Connection to verify your credentials at any time.
3. Get your webhook URL
Click Get Webhook URL. The plugin resolves the bucket's public input URL (creating the bucket if it doesn't exist yet) and shows the value to paste into your repository:

Add it as a webhook in your repository settings:
| SCM | Where to paste the URL |
|---|---|
| GitHub | Settings → Webhooks → Add webhook → Payload URL (content type application/json) |
| GitLab | Settings → Webhooks → URL |
| Bitbucket | Repository settings → Webhooks → Add webhook → URL |
That's the only change in your SCM — you point the webhook at the Webhook Relay URL instead of at Jenkins directly.
4. Trigger a build
Configure the Jenkins job exactly as you would for a public Jenkins. For GitHub, that means a
Pipeline or Freestyle job with a Git SCM and GitHub hook trigger for GITScm polling
enabled (githubPush() in a declarative pipeline). For GitLab and Bitbucket, enable the
corresponding hook trigger; for everything else, use the
Generic Webhook Trigger.
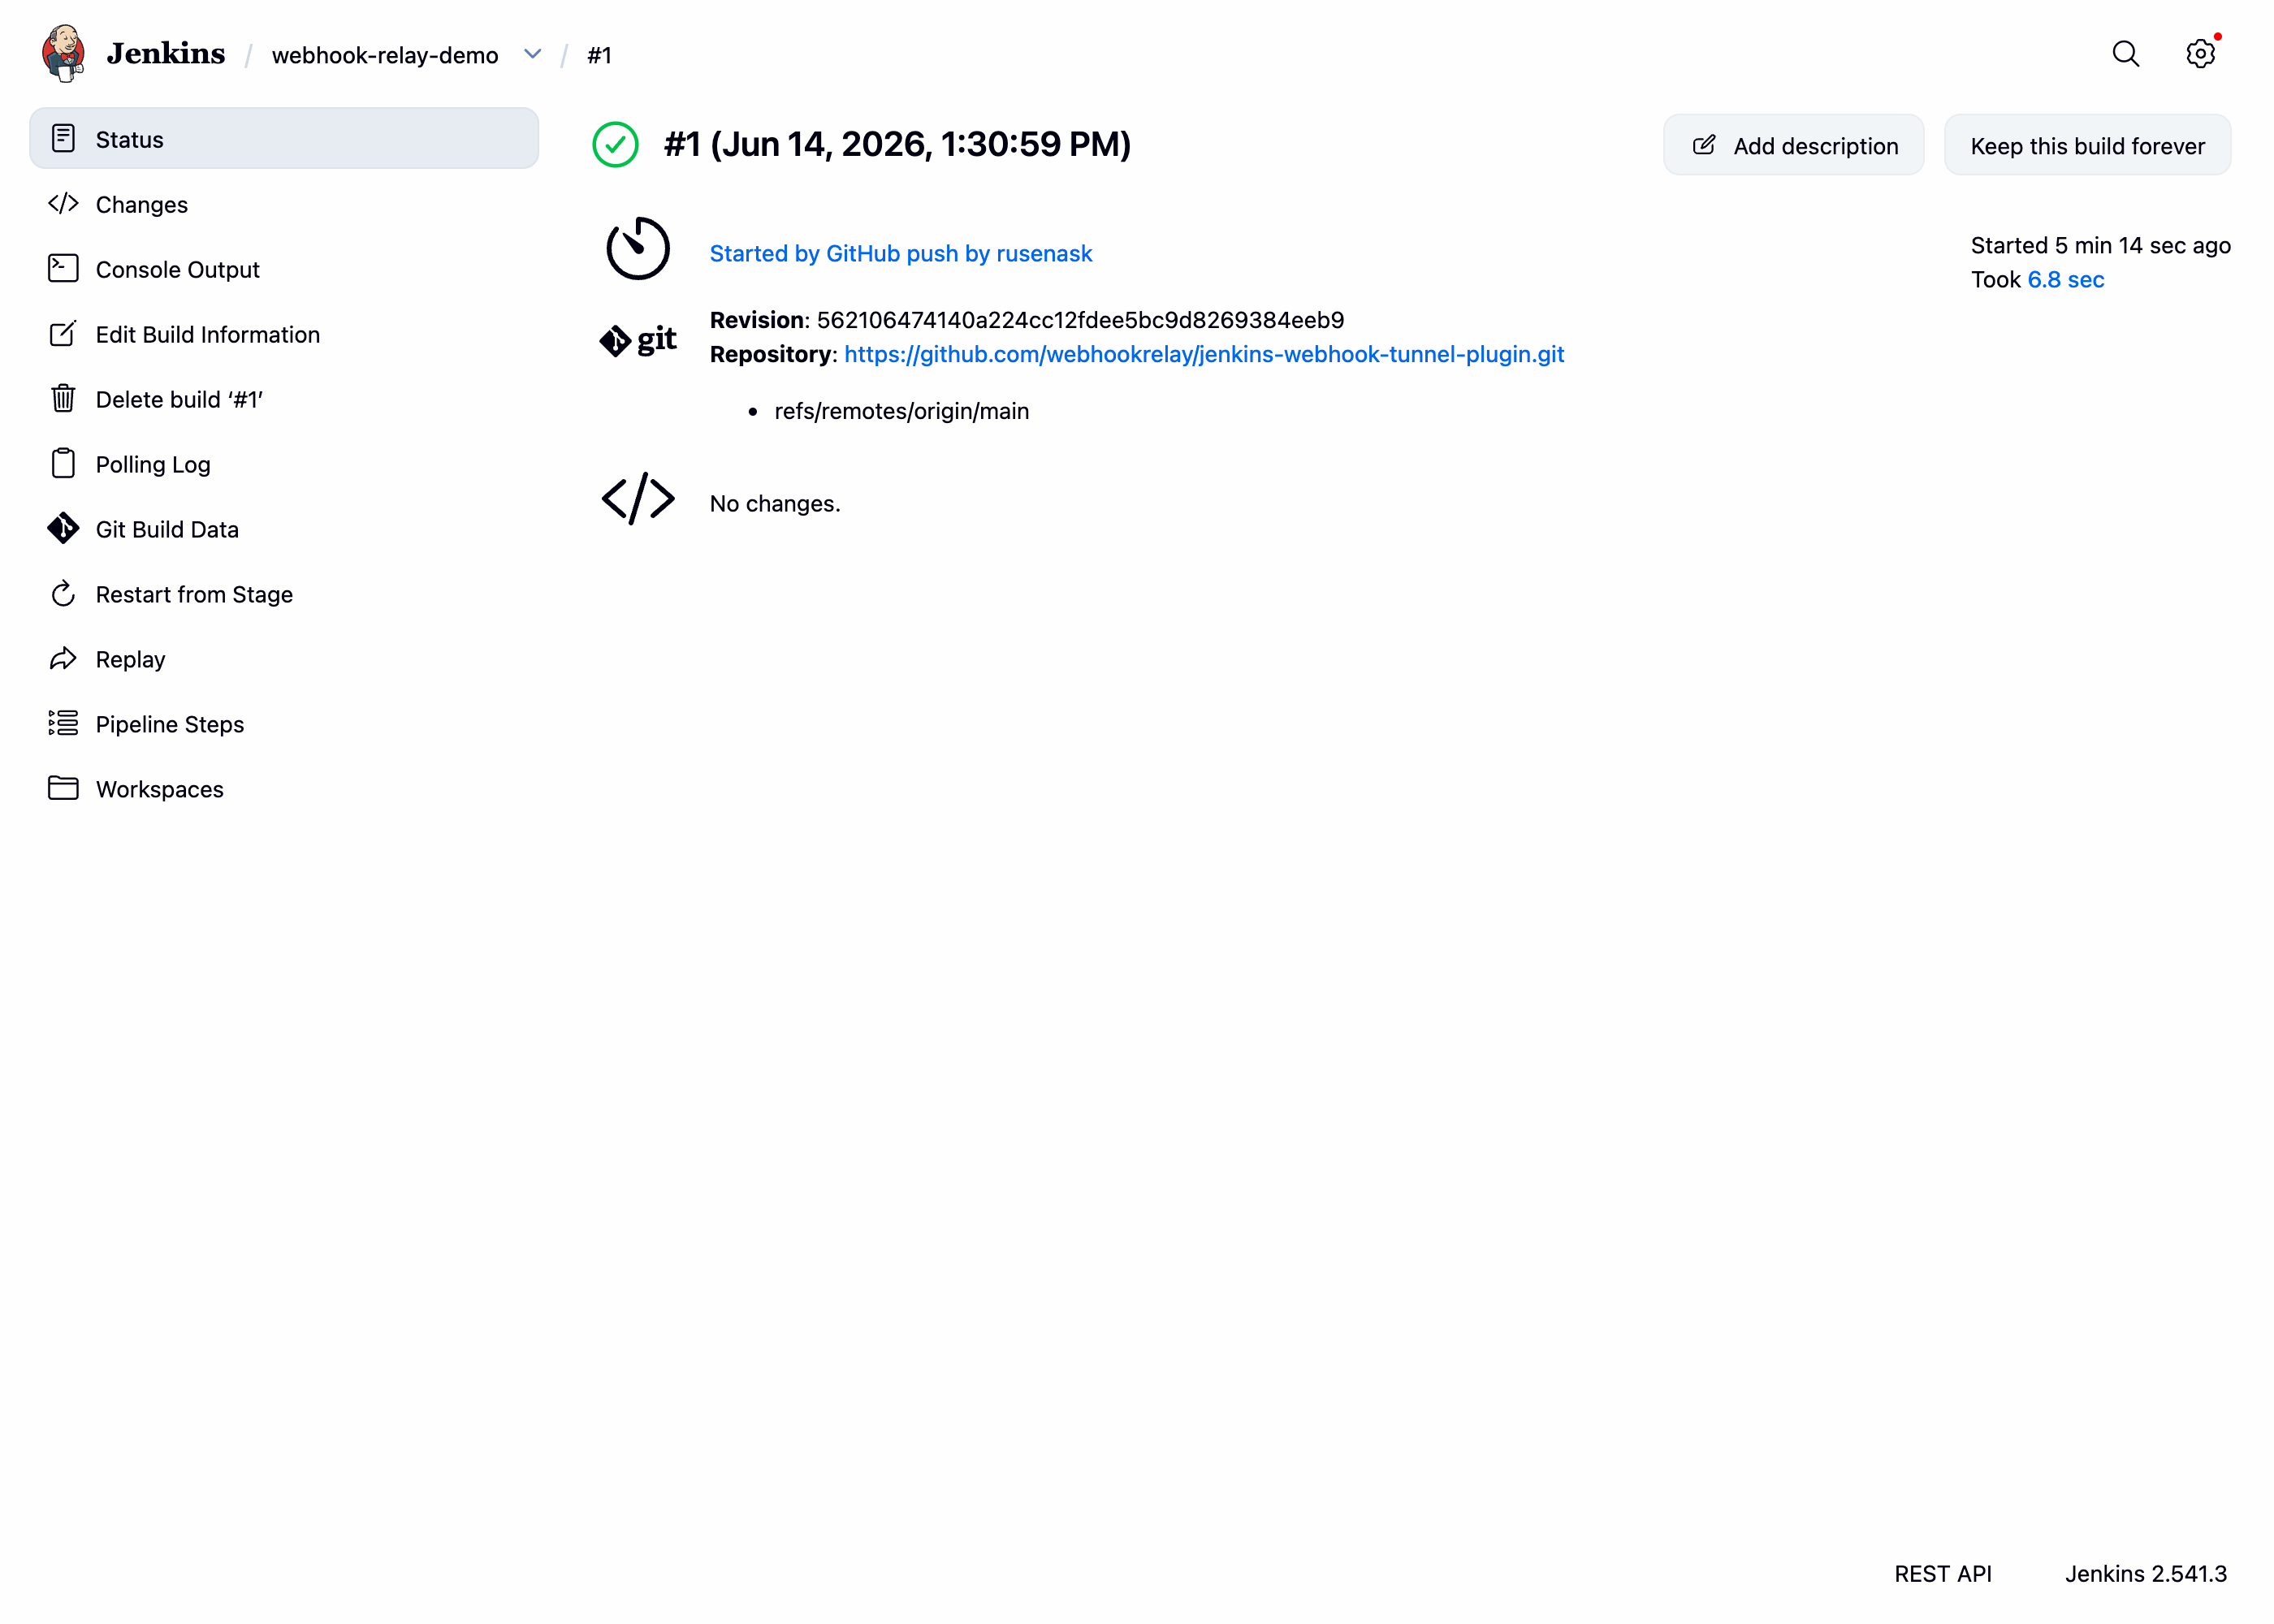
Now push a commit. The webhook travels GitHub → bucket → plugin → /github-webhook/, and the
build starts:
5. Multibranch Pipelines
Multibranch Pipeline projects work too, but they are configured differently — a Multibranch Pipeline has no Build Triggers section. Branch and pull request jobs are created and triggered by the branch source (e.g. GitHub Branch Source) reacting to the webhook events the plugin delivers to the same endpoints.
The full setup — branch builds, automatic jobs for new branches and pull requests — has its own page: Jenkins Multibranch Pipelines.
6. Inspect deliveries
Open your bucket on my.webhookrelay.com/buckets. Each
webhook is listed with its method, status and the response Jenkins returned — a sent status
with response status 200 means Jenkins accepted the webhook.
Try it with Docker
The plugin repository ships a ready-to-run demo (Jenkins + Configuration as Code):
git clone https://github.com/jenkinsci/webhook-relay-plugin
cd webhook-relay-plugin
mvn -q clean package
docker compose -f demo/docker-compose.yml up --build   # Jenkins on http://localhost:8095
Then follow the steps above.
Prefer the CLI agent?
If you'd rather run a standalone forwarding agent instead of installing a plugin, see
Jenkins and GitHub and
Jenkins and Bitbucket, which use the relay CLI.
The plugin and the CLI agent both deliver through buckets, so the logs and SCM setup are
identical — the plugin just removes the separate agent process.